Access Your Print Account
Access your Tyndale printing account to load funds and access Mobility Print to add a Tyndale printer queue directly to your personal device. Also print PDF files using your personal device using WebPrint.
Is a Printer Running Low On Paper Or Toner?
Please fill out this form to let IT know if a printer is running low on supplies and we will refill and restock the printer and cabinet ASAP.
Printing Rates
All Tyndale printers have the following costs associated with printing and scanning:
Black & white printing/copying $0.10/page
Colour printing/copying $0.45/page
Scanning to email $0.00/page
Tyndale Staff and Faculty do not require credit to print. If your account is being advised that you need credit to print and you are Staff or Faculty, please contact Tyndale IT at tyndaleit [at] tyndale [dot] ca.
How to Print and Scan
Printing Directly from your Windows personal device
Tyndale printers now support printing directly from your personal device by using what's called PaperCut Mobility Printing. Mobility Printing means that you can now print documents directly to a Tyndale printer from any application or format from your personal device. Currently, supported devices include IOS, Android, Windows and MacOS devices. Unfortunately, at this time, Chromebook devices are not supported. WebPrint remains the best option to print from Chromebook devices.
To setup Mobility Print on your device, please visit https://print.tyndale.ca:9164/setup on your device. The system will autodetect what type of device you are using and display the appropriate set of instructions required to get printing up and running on your device.
Please see below for the list of available instructions for Windows systems.
Windows
1. Visit https://print.tyndale.ca:9164/setup using your Windows laptop.
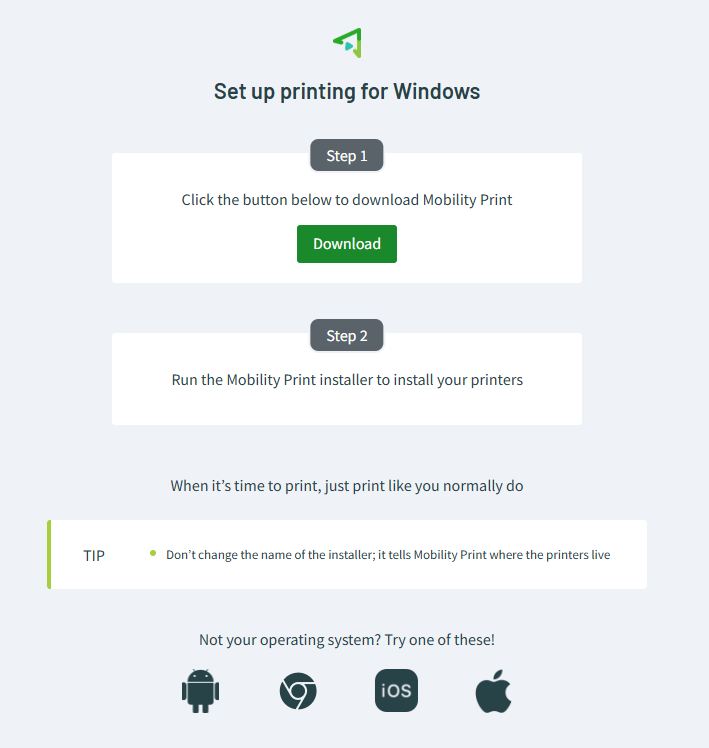
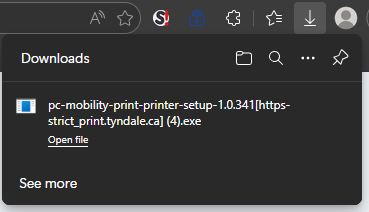
2. Click on the Download button and a Mobility Print installation file will be downloaded to your computer. Look in your Downloads folder or in the Browser downloads area for the file that was downloaded. The filename should be "pc-mobility-print-printer-setup-1.0.341[https-strict_print.tyndale.ca].exe" - please do not rename the file as the installation of the printer queue depends on the name of the installation file remaining as is.
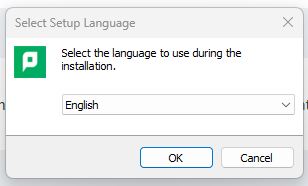
3. Double-click or execute the installation file that you downloaded. You may need to confirm that you permit the installation file to make changes to your computer. Select your installation language of choice and click OK.
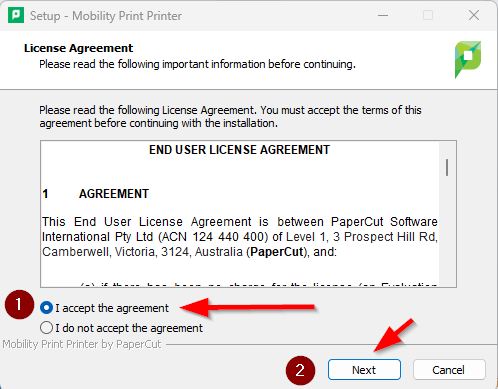
4. Read through the End User License Agreement and if you agree, choose "I accept the agreement" and then click Next.
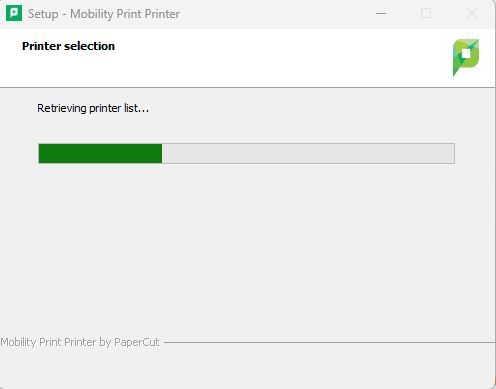
5. Wait for the program to retrieve the Tyndale printer queue list from the server.
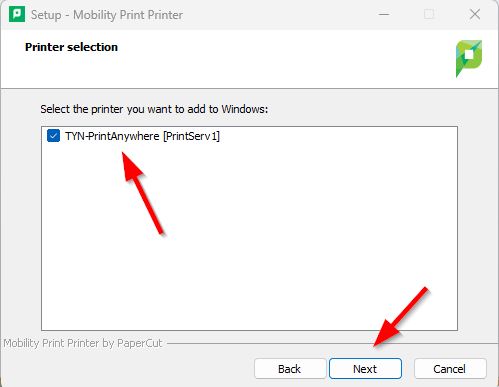
6. The Tyndale printer queue called "TYN-PrintAnywhere" is automatically selected. This printer queue is what will appear in your programs when you are printing. It is functionally the same as the Tyndale print queue named "PrintAnywhere" that is available on Tyndale computers with the addition of the TYN abbreviation, so you'll be able to identify it as a Tyndale print queue. Click next.
7. This screen is requesting your Tyndale staff username or MyTyndale student username and password. This information will be used to authenticate your print jobs and deduct any applicable print credit from your print account. As a reminder, your username is the first part of your Tyndale or MyTyndale email address without the @tyndale.ca or @mytyndale.ca portion. If your username is jamescrow [at] tyndale [dot] ca, your username would simply be jamescrow
Click next. When your Tyndale password changes, you will likely need to re-setup your print queue using these instructions.

8. Click Finish.
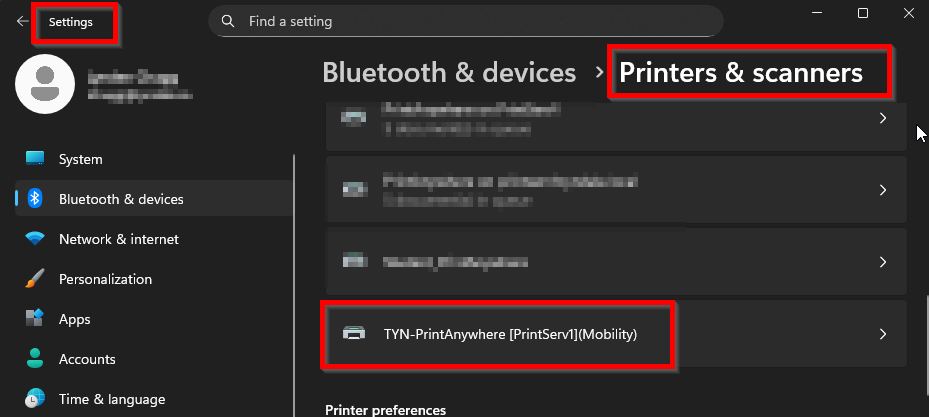
9. On your Windows device, you should now see a print queue called "TYN-PrintAnywhere [PrintServ1](Mobility)"
10. Done! You should now be able to print directly to this Tyndale print queue from any Windows application and visit any Tyndale printer to release your print job as normal. You should also now see any submitted print jobs in the "Jobs Pending Release" area of WebPrint.
Printing Directly from your Android Personal Device
Tyndale printers now support printing directly from your personal device by using what's called PaperCut Mobility Printing. Mobility Printing means that you can now print documents directly to a Tyndale printer from any application or format from your personal device. Currently, supported devices include IOS, Android, Windows and MacOS devices. Unfortunately, at this time, Chromebook devices are not supported. WebPrint remains the best option to print from Chromebook devices.
To setup Mobility Print on your device, please visit https://print.tyndale.ca:9164/setup on your device. The system will autodetect what type of device you are using and display the appropriate set of instructions required to get printing up and running on your device.
Please see below for the list of available instructions for Android devices.
Android Devices
1. Visit https://print.tyndale.ca:9164/setup using your Android device.

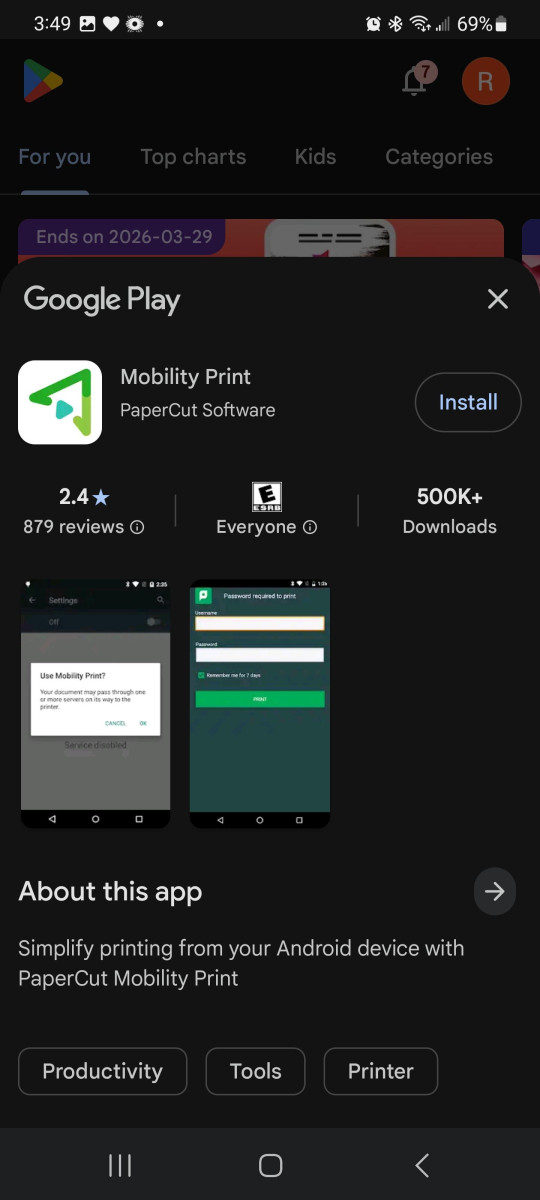
2. Click on the "Install or update" button on your Android device and you will be redirected to the Google Play Store where you can download and install the PaperCut Mobility Android app. Click on Install.
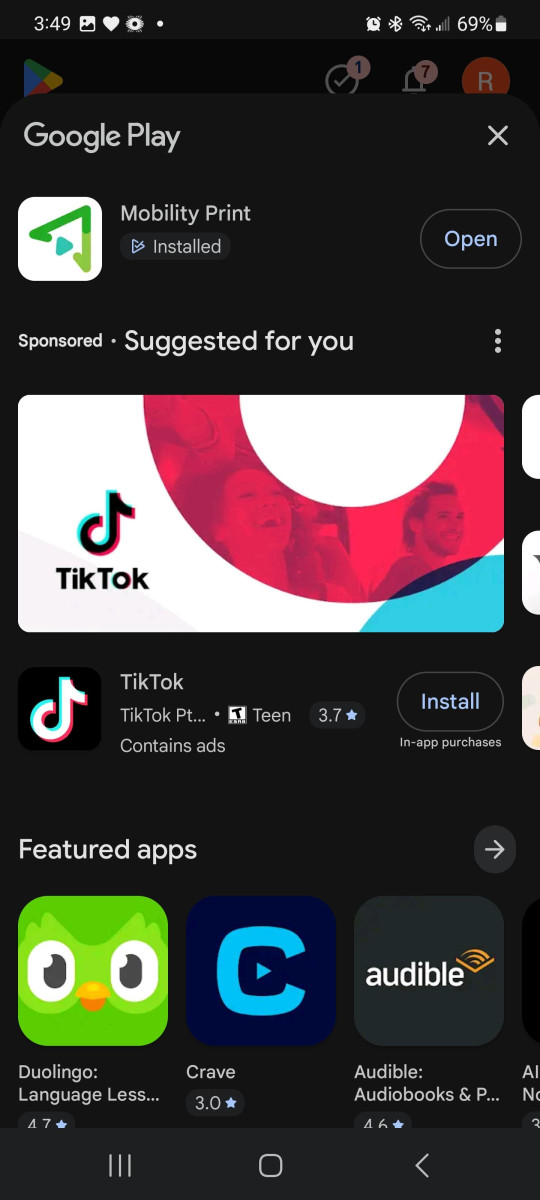
3. Click on Open to start the app.
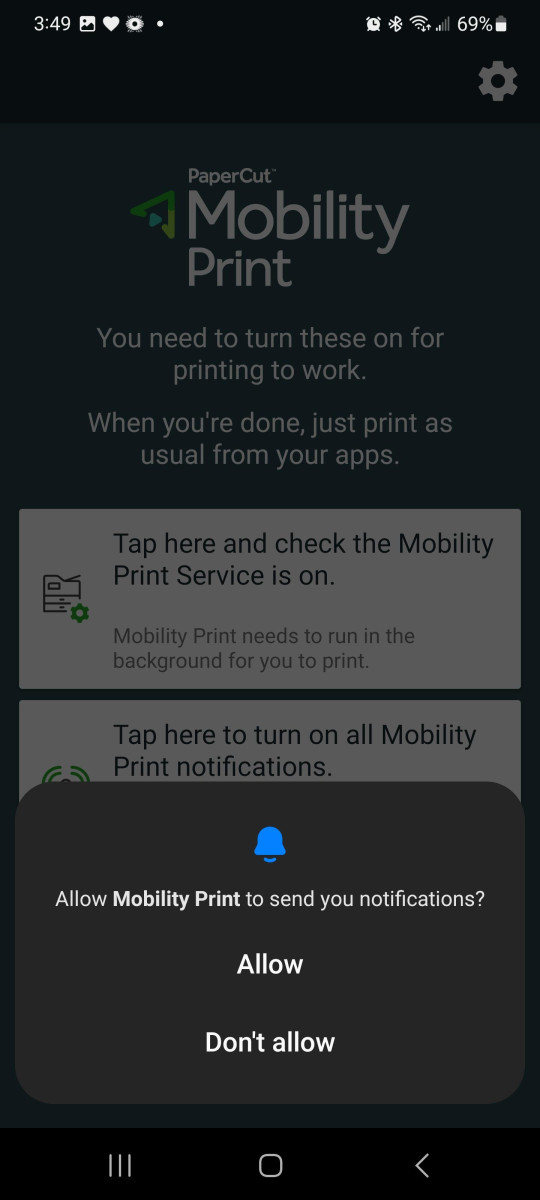
4. Be sure to enable Notifications from the app such that you see the status of or be aware of issues with your submitted print jobs.
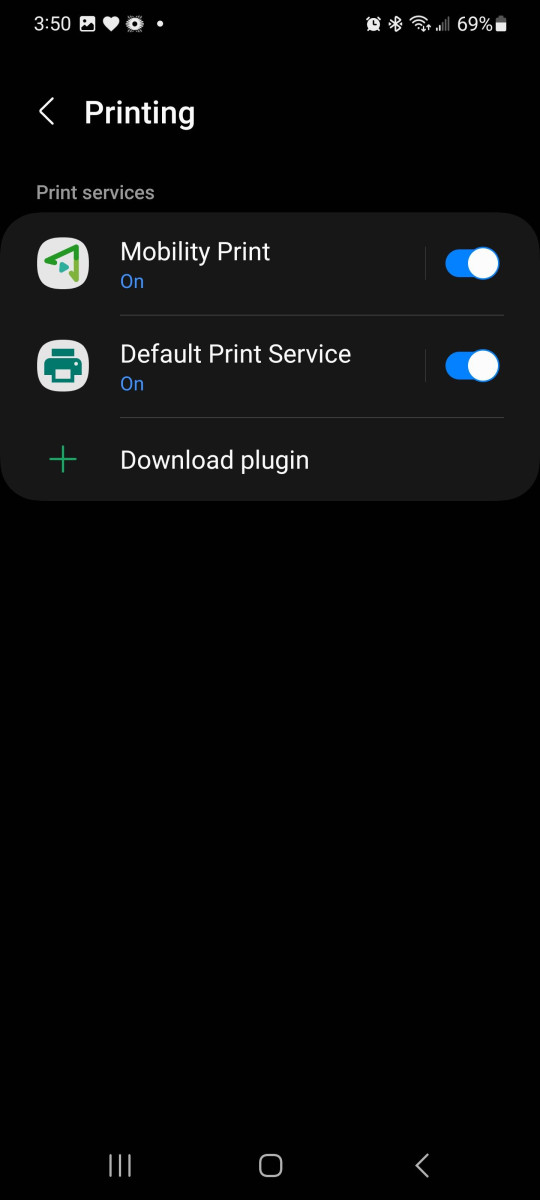
5. Click on "Tap here and check the Mobility Print Service is on"
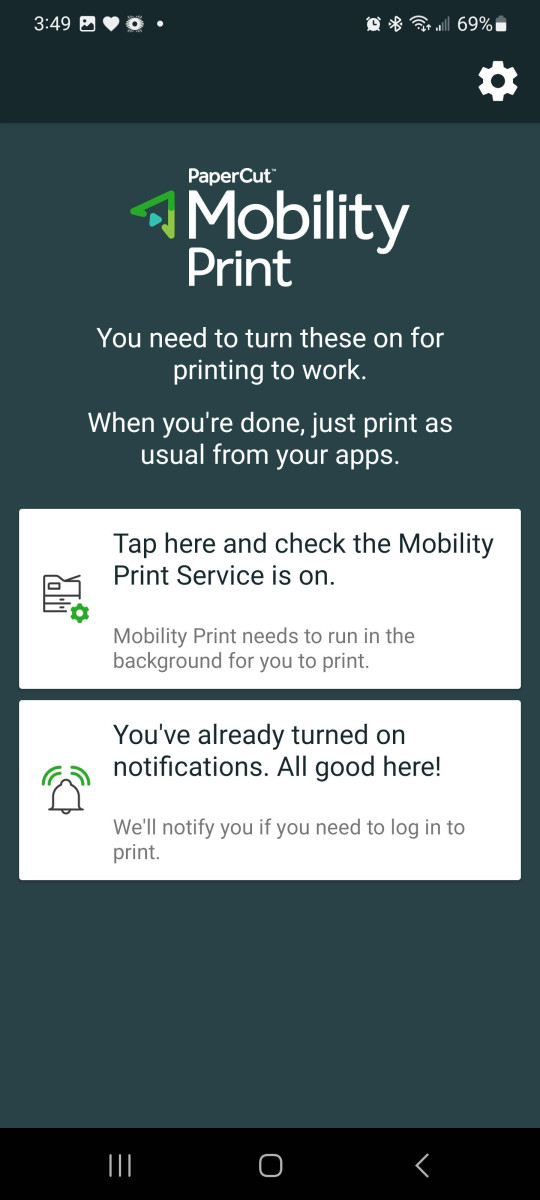
6. Be sure the "Mobility Print" service tab is listed as "On" and is enabled.
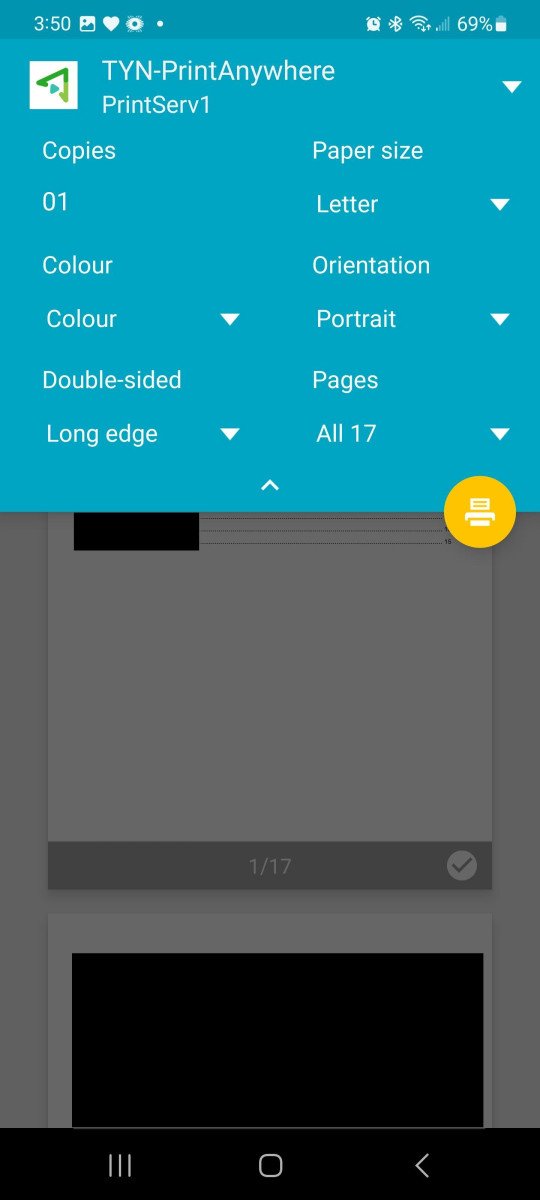
7. The Tyndale printer queue called "TYN-PrintAnywhere" should now be available. This printer queue name is what will appear in your apps when you are printing. It is functionally the same as the Tyndale print queue named "PrintAnywhere" that is available on Tyndale computers with the addition of the TYN abbreviation, so you'll be able to identify it as a Tyndale print queue. The below screenshot shows a document being printed in the Word app. Click Print or the print icon to print a document to the selected TYN-PrintAnywhere queue in your application.
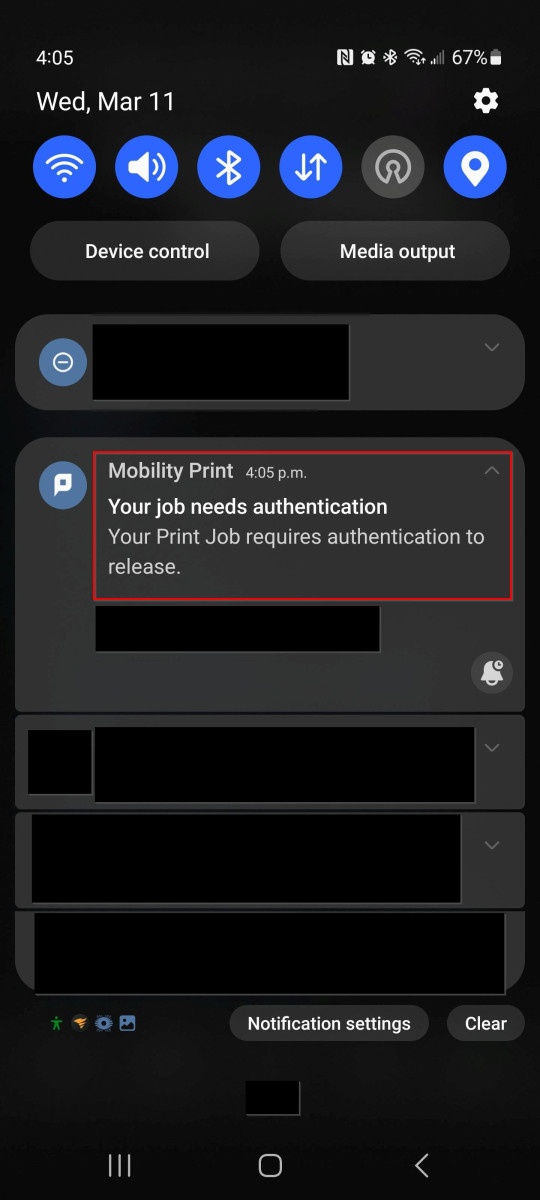
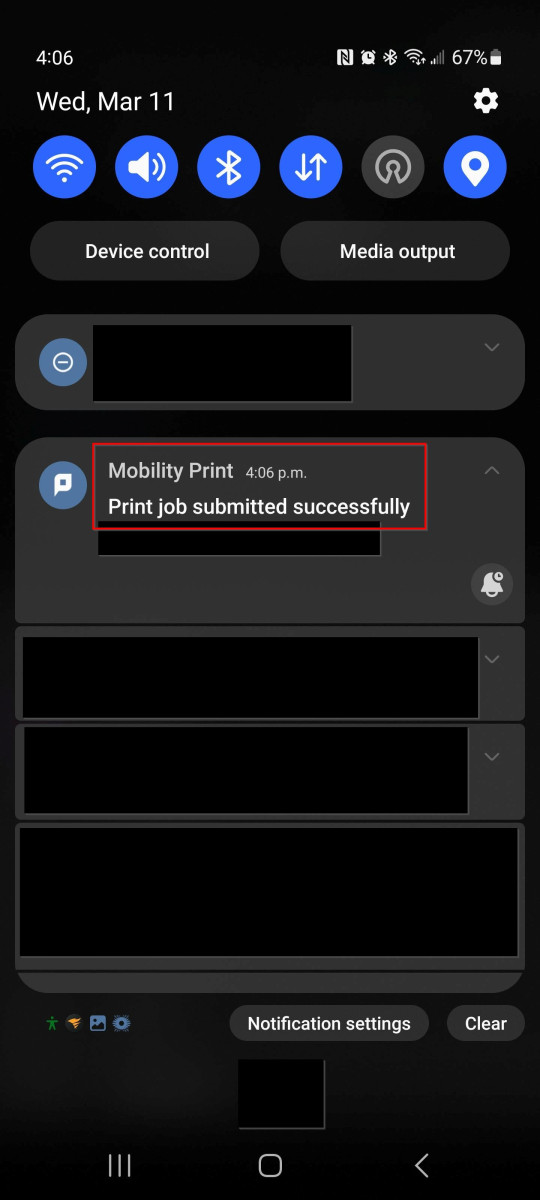
8. Now you will need to authenticate the submitted print job. You should only have to do this once. Check the notification area of your phone for information regarding your submitted print job. It should say something regarding that authentication is needed to release the print job to the print queue. Click on the notification.
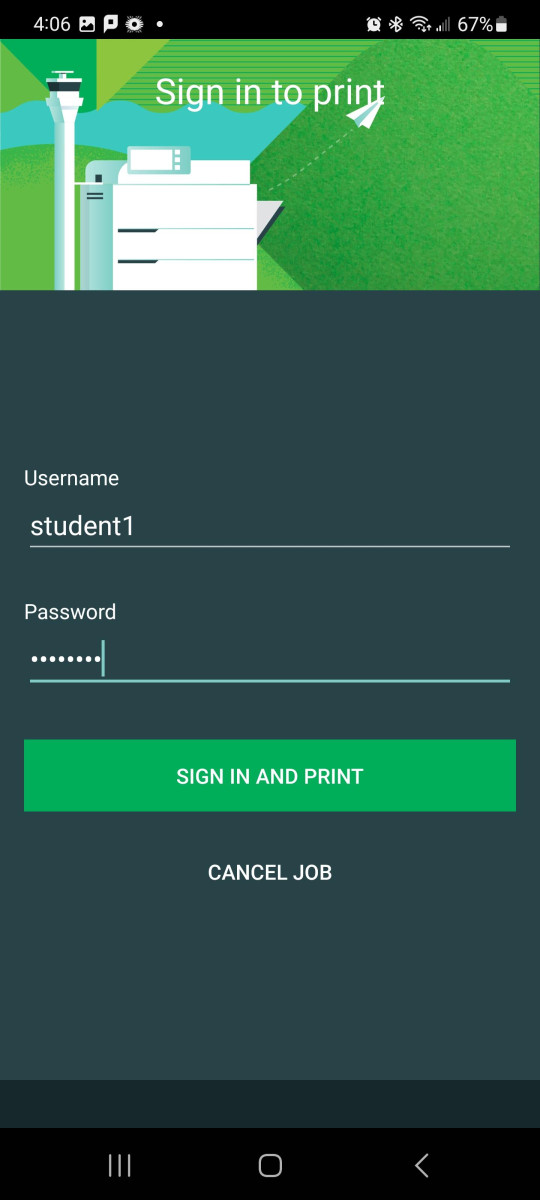
9. This screen below is requesting your Tyndale staff username or MyTyndale student username and password. This information will be used to authenticate your print jobs and deduct any applicable print credit from your print account. As a reminder, your username is the first part of your Tyndale or MyTyndale email address without the @tyndale.ca or @mytyndale.ca portion. If your username is jamescrow [at] tyndale [dot] ca, your username would simply be jamescrow
Click "Sign in and Print". When your Tyndale password changes, you will likely need to re-setup your print queue using these instructions.
10. Your print job should now be submitted, and you should see a successful notification from the Mobility Print app in your notification area. You should also see your print job in the "Jobs Pending Release" area of WebPrint. Your print job is now ready for release from any Tyndale printer.
11. Done! You should now be able to print directly to this Tyndale print queue from any Android application and visit any Tyndale printer to release your print job as normal. One note is that depending on how your Android device treats inactive apps, you may have to re-enable the Mobility Print app in order to print to it if you do not print for a longer period of time.
Printing Directly from your Macintosh Macbook MacOS Personal Device
Tyndale printers now support printing directly from your personal device by using what's called PaperCut Mobility Printing. Mobility Printing means that you can now print documents directly to a Tyndale printer from any application or format from your personal device. Currently, supported devices include IOS, Android, Windows and MacOS devices. Unfortunately, at this time, Chromebook devices are not supported. WebPrint remains the best option to print from Chromebook devices.
To setup Mobility Print on your device, please visit https://print.tyndale.ca:9164/setup on your device. The system will autodetect what type of device you are using and display the appropriate set of instructions required to get printing up and running on your device.
Please see below for the list of available instructions for Macintosh MacOS devices.
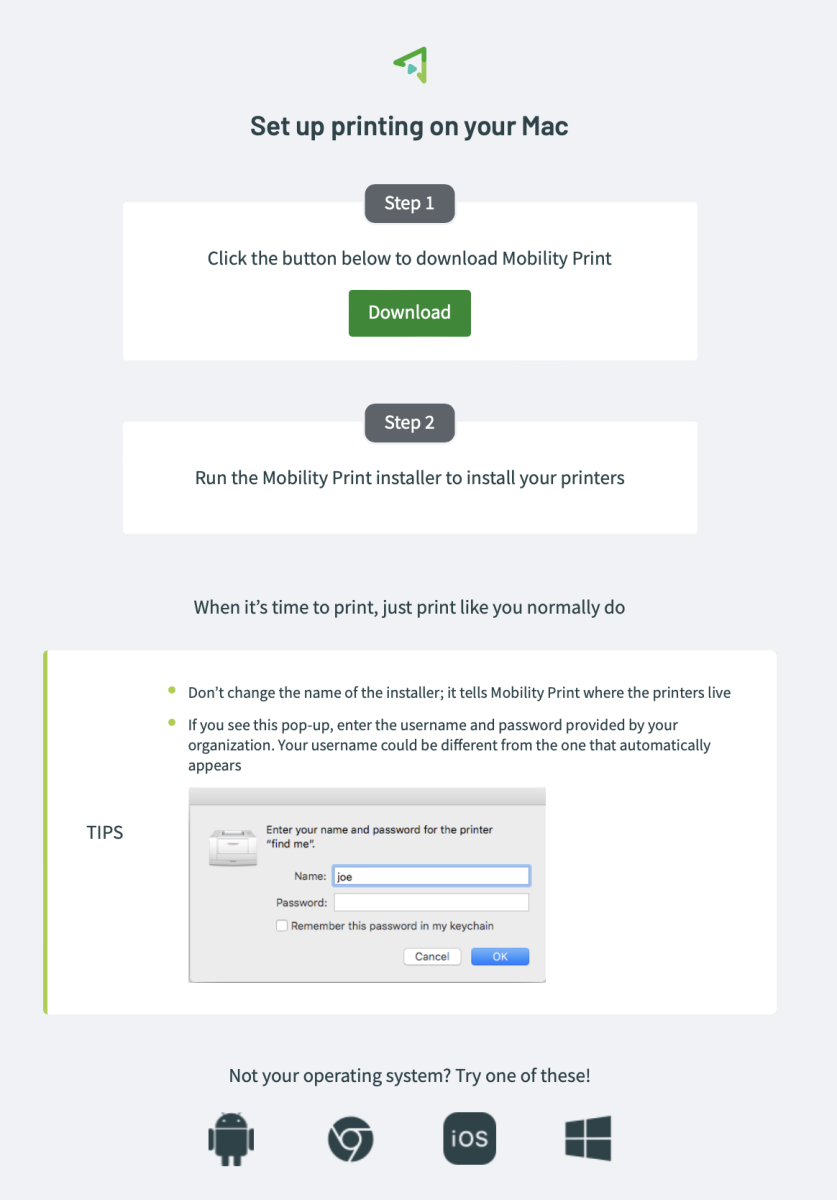
1. Visit https://print.tyndale.ca:9164/setup using your Macintosh MacOS device. Click on the Download button to download the installation file to your Mac. Please do not change the name of the downloaded file, as the print queue installation is dependent on the name of the file.
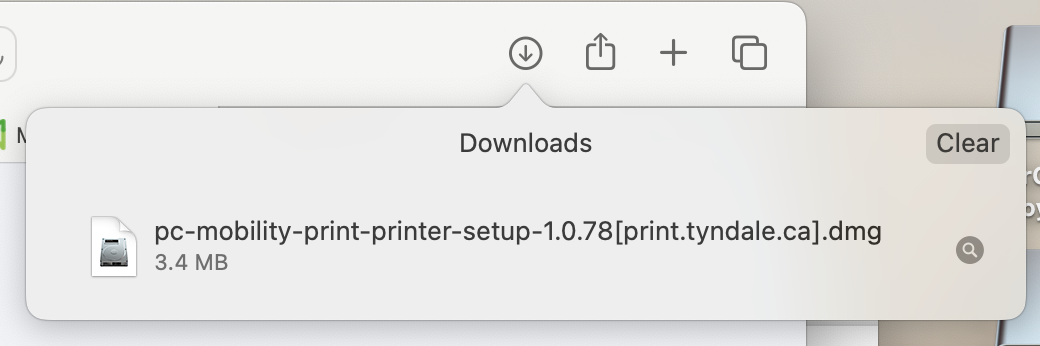
2. Find the downloaded installation file in your Browser or in your Download directory. Double click the file to mount it. Currently, the name of the installation file is pc-mobility-print-printer-setup-1.0.78[print.tyndale.ca].dmg - Please do not change the name of this installation file, as it tells the server where the printers are.
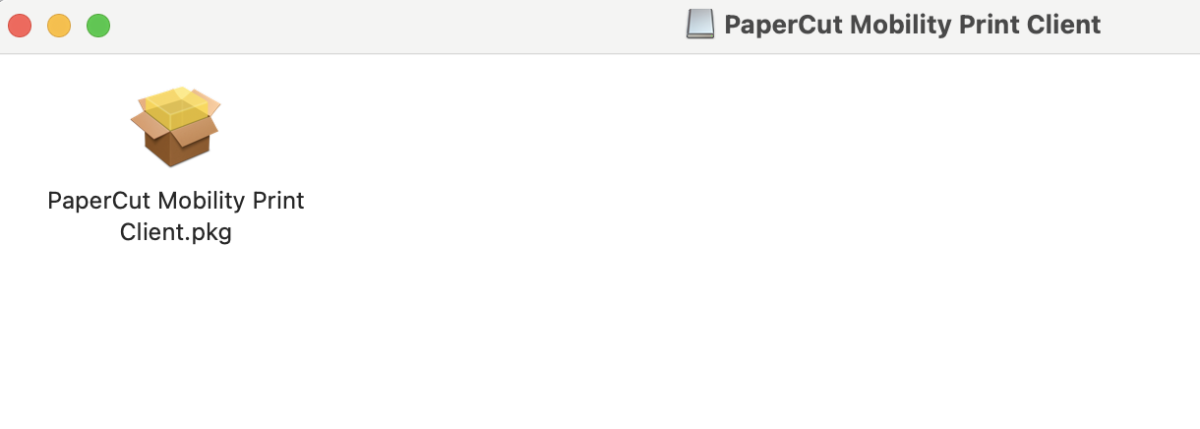
3. Double click on the "PaperCut Mobility Print Client.pkg" file to start the installation process. You may be asked for a username and password to authorize the installation of the software. This username and password are not your Tyndale or MyTyndale account. Instead, this username and password is the username and password you use to login to your computer.
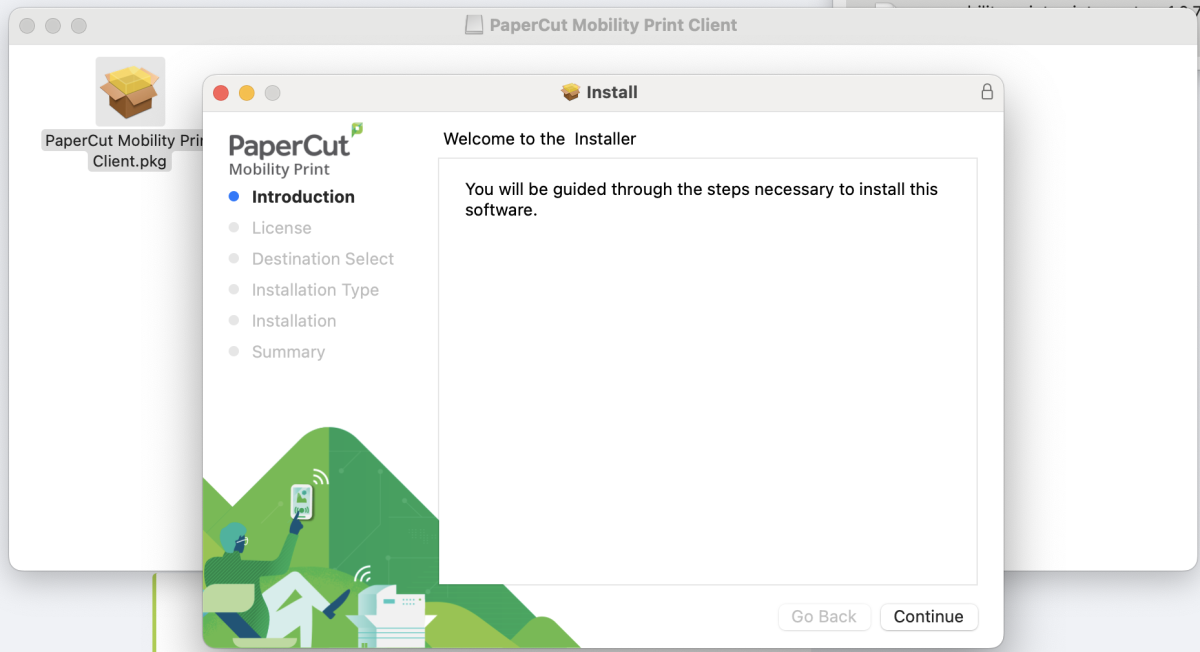
4. The installation should now start. Click on Continue.
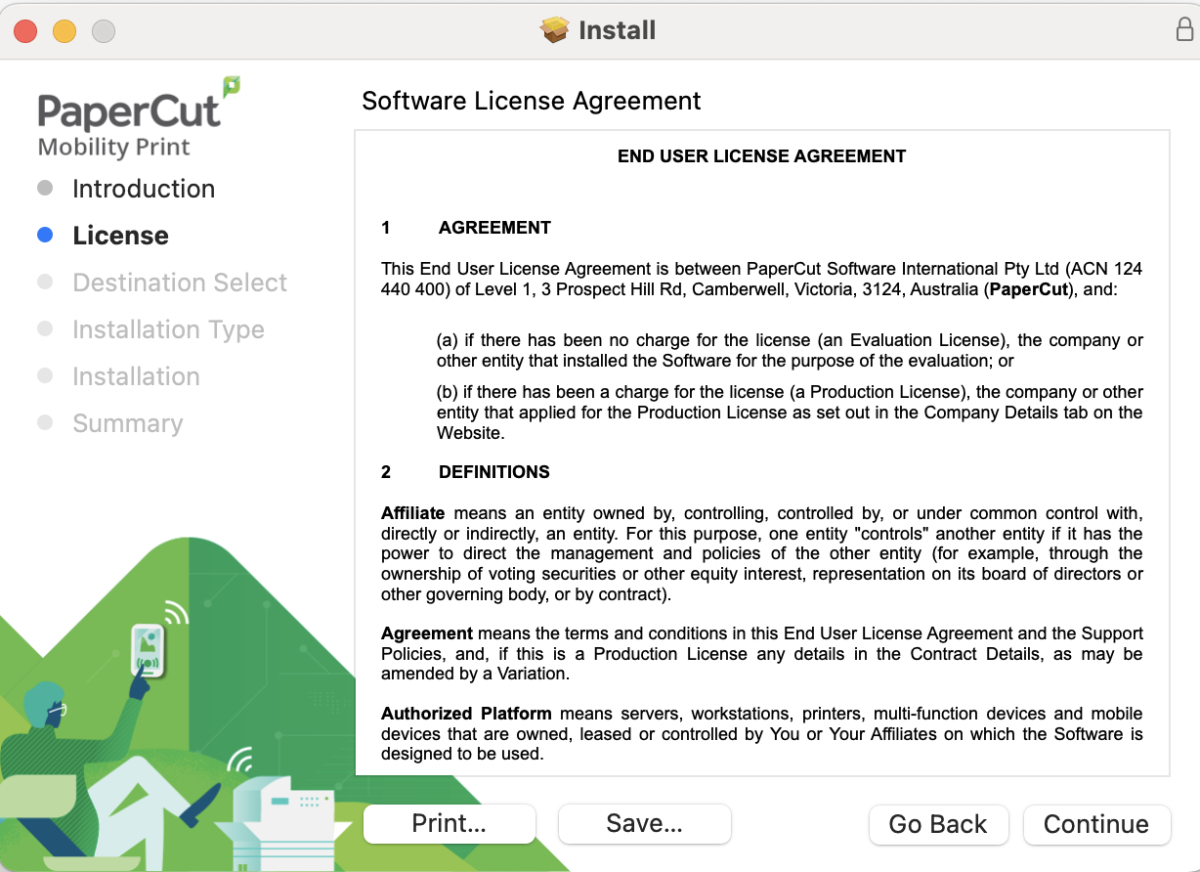
5. Read through the Software License Agreement. If you agree with, please click on Continue.
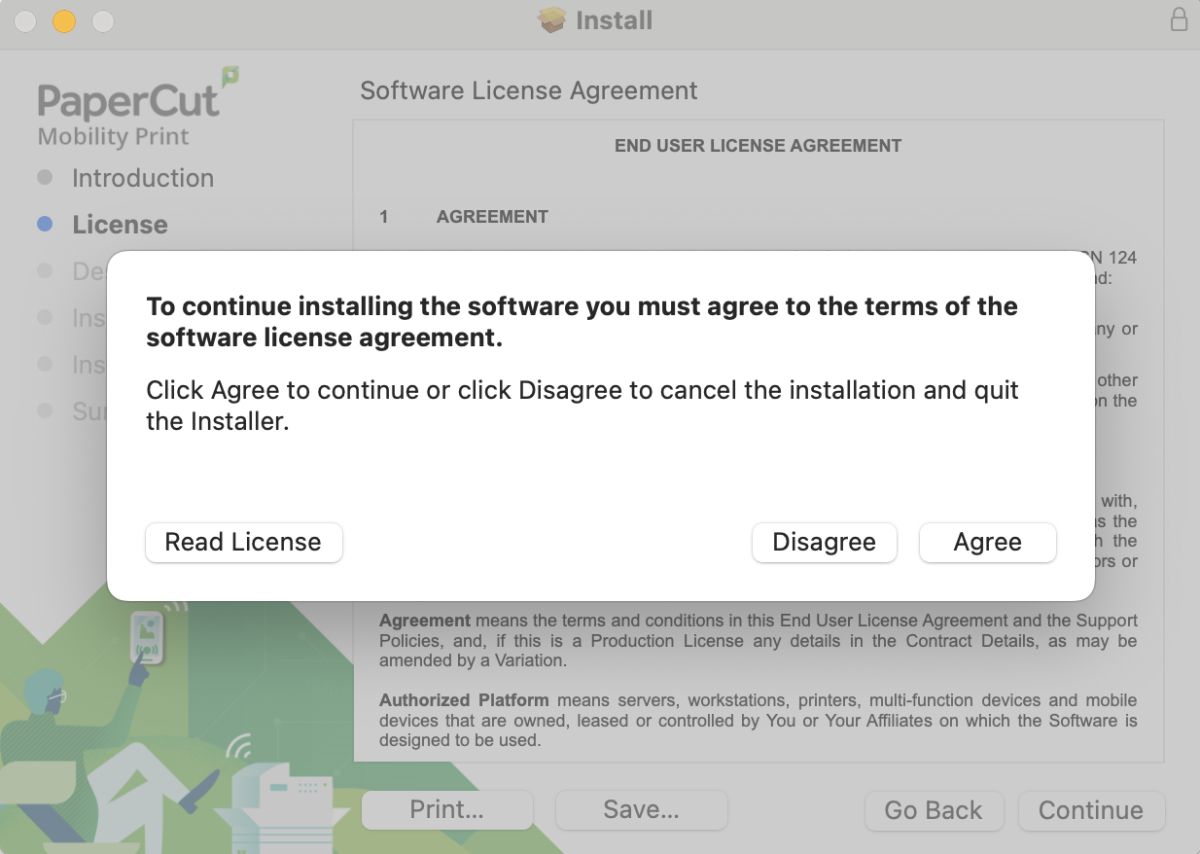
6. Again, if you agree with the Agreement, click on Agree.
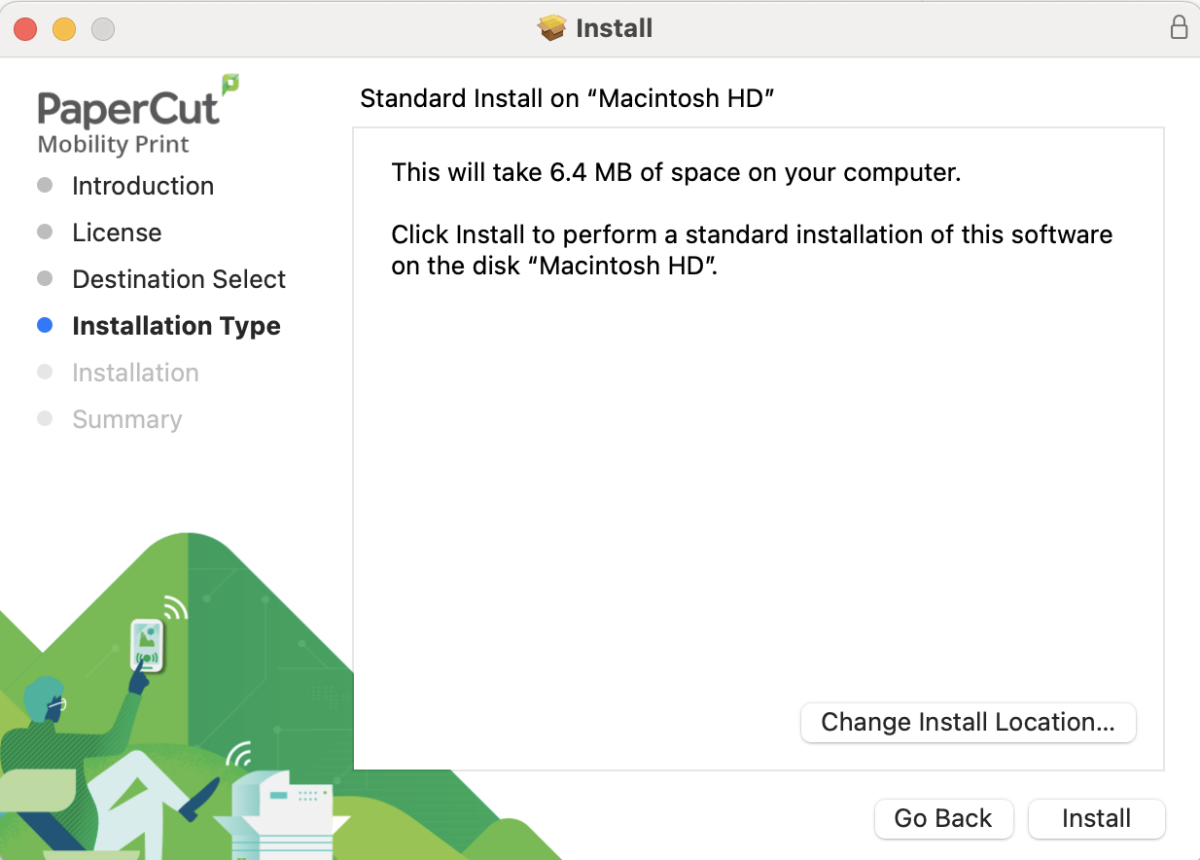
7. Click on Install to continue the software installation.
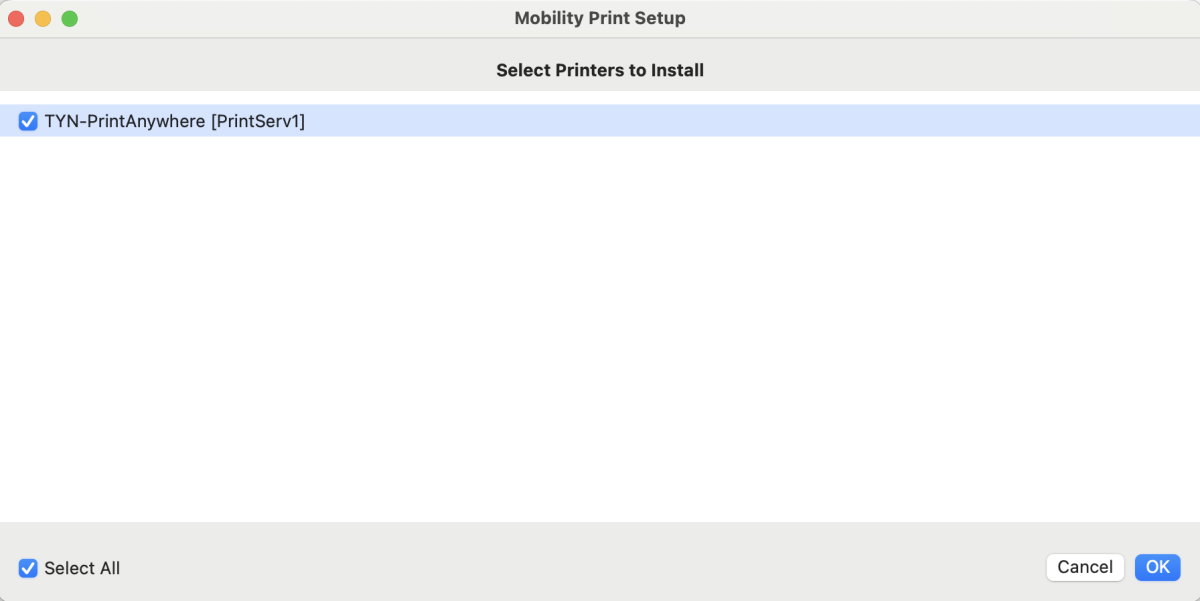
8. The installation program will now try and pull the list of print queues from the server. Be sure to select and click on the print queue "TYN-PrintAnywhere [PrintServ1]" option box to select it and then click OK at the bottom right of the window.
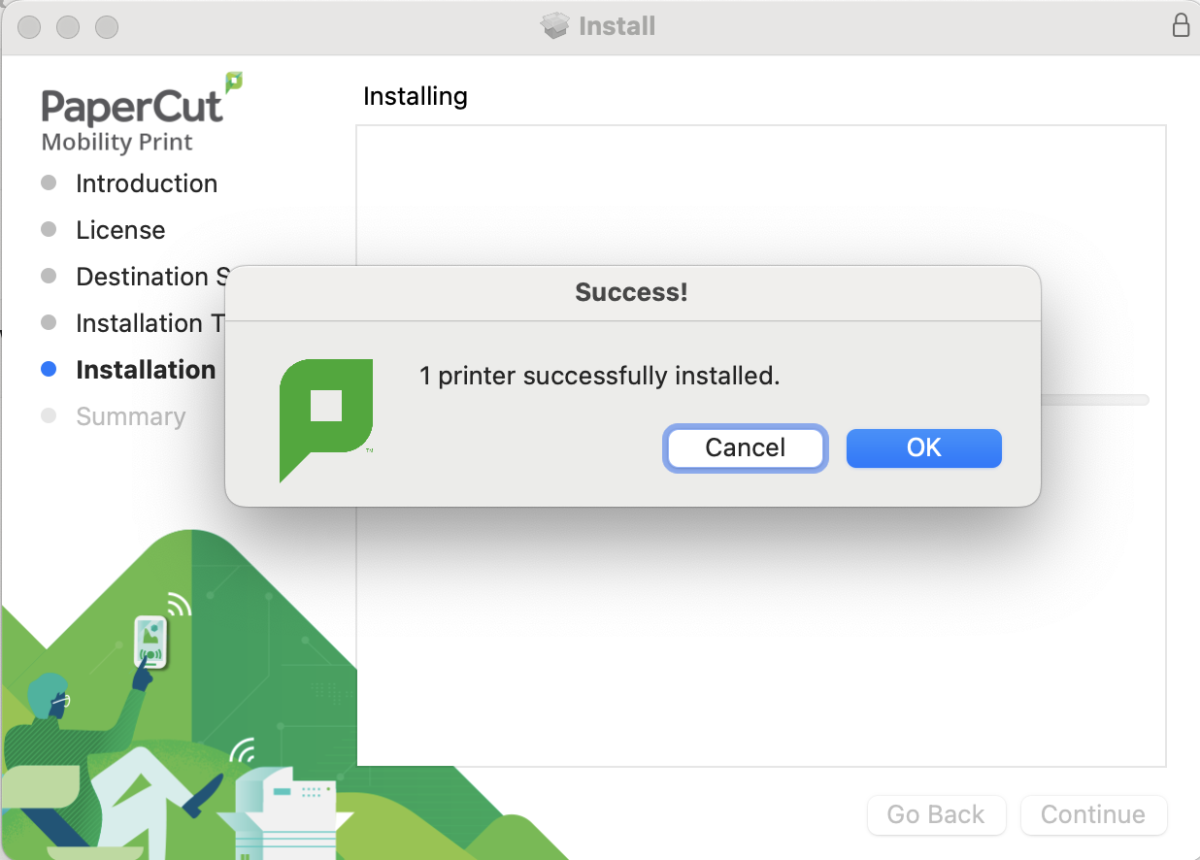
9. Success! The print queue is now installed on your computer. Click OK.
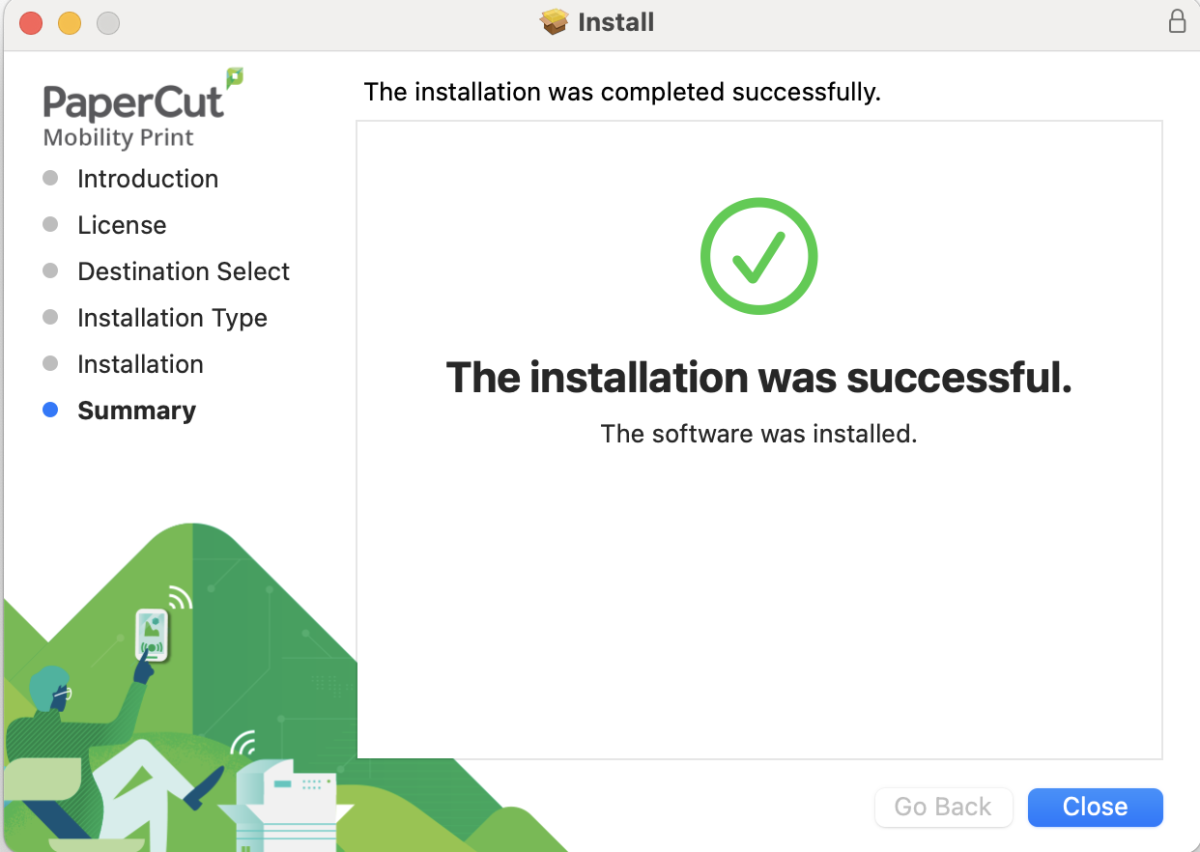
10. Click on Close on the bottom right to complete the installation.
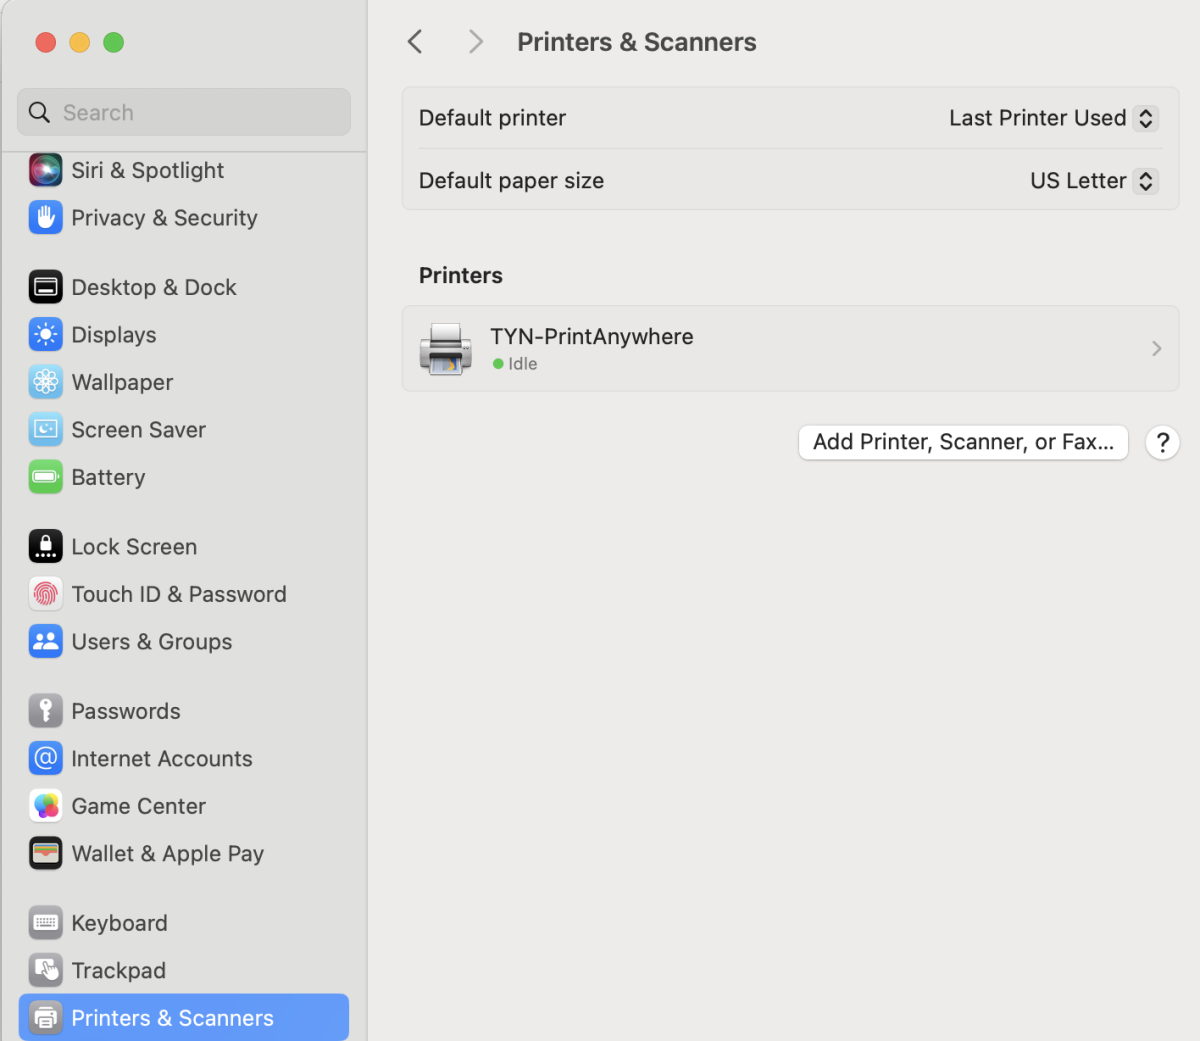
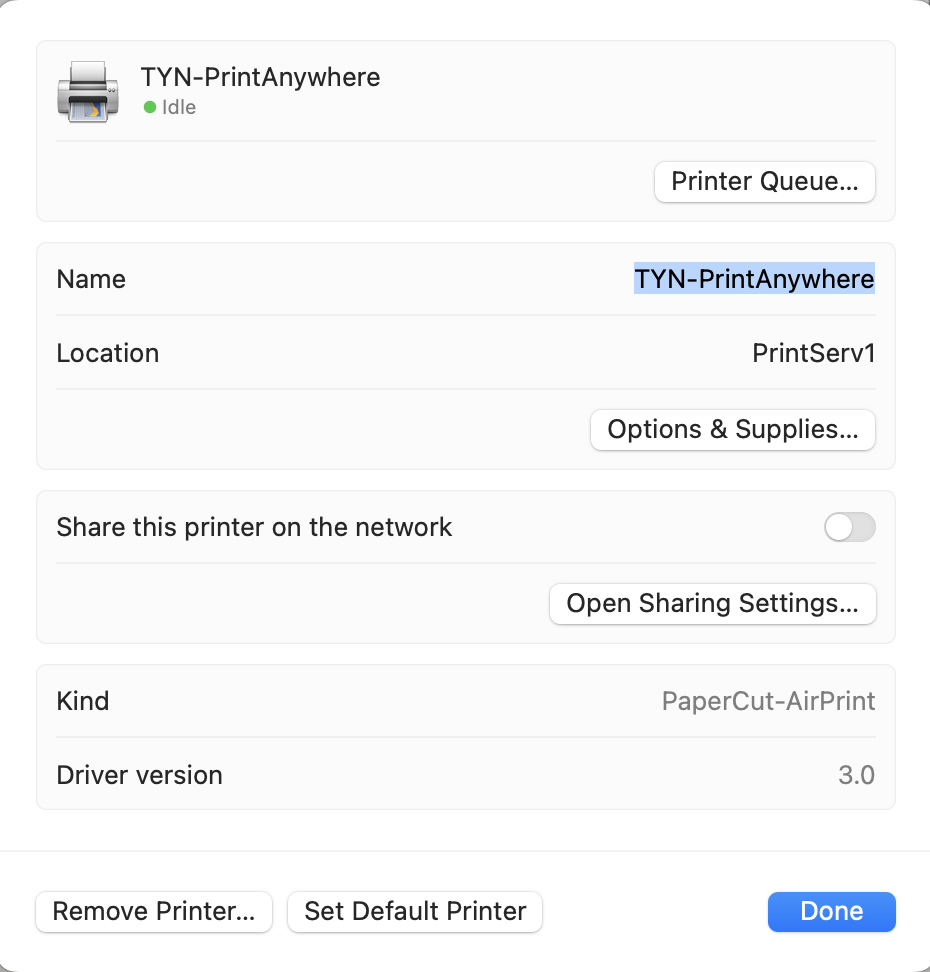
11. Next, start your Settings application and click on the Printers and Scanners menu entry at the very bottom of the left menu, and you should now see the "TYN-PrintAnywhere" printer added to your computer. Leave this window open as we will come back to it.
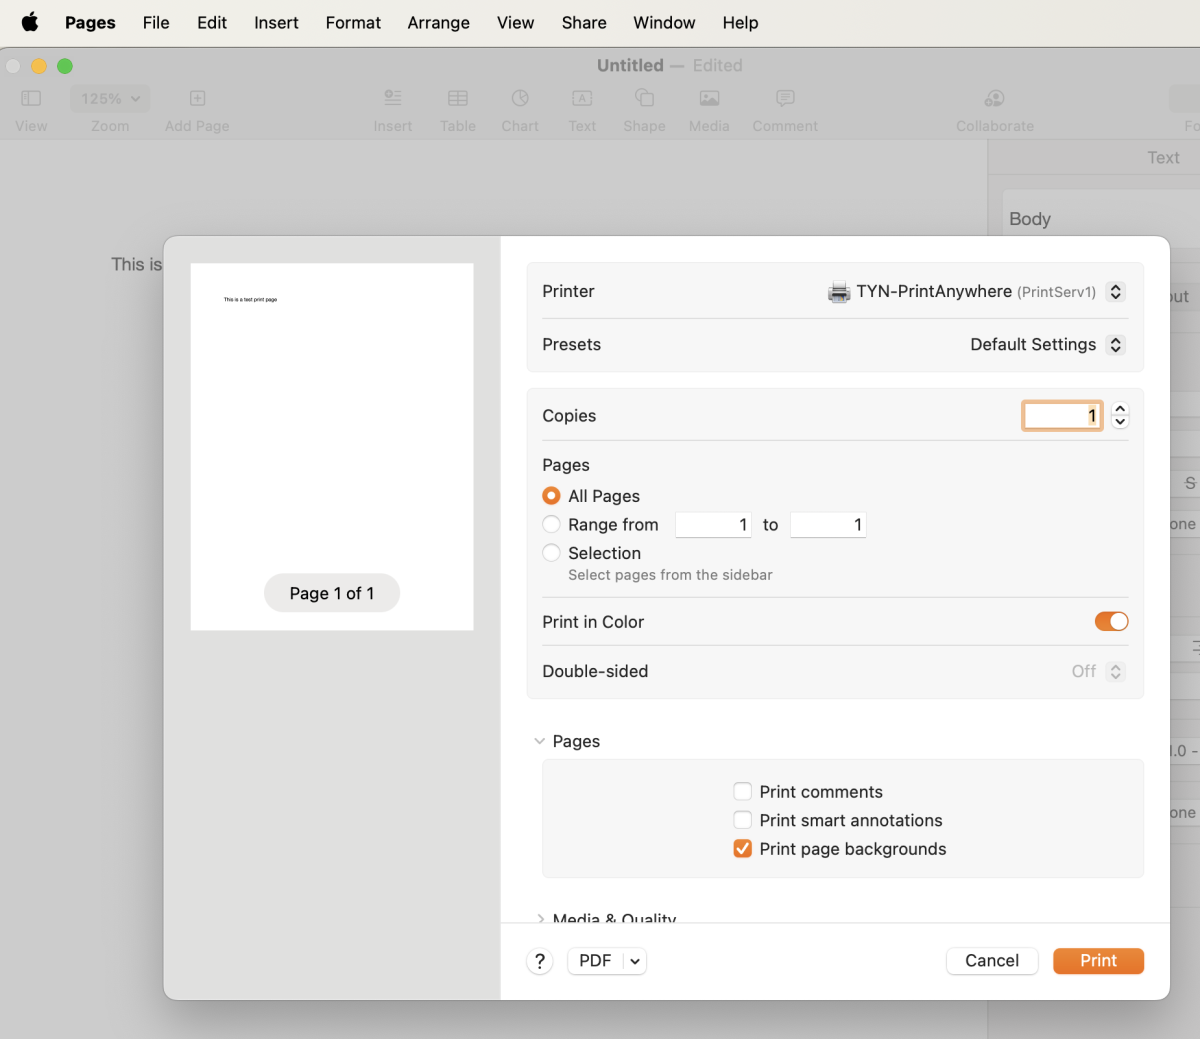
12. Next, open a program like Pages or a text editor to complete a test print. Type in some test words and then find the Print window/function in your program. In Pages, you can press Command-P keys to bring this print window up or click on File menu and then click Print.
Be sure that the printer queue TYN-PrintAnywhere is selected in the Printer field and click Print.
You should be prompted with a prompt to enter your Tyndale or MyTyndale username and password to link the TYN-PrintAnywhere printer to your Tyndale account. We suggest checking off the option to save the password in your keychain. As a reminder, your username is the first part of your Tyndale or MyTyndale email address without the @tyndale.ca or @mytyndale.ca portion. If your username is student1 [at] tyndale [dot] ca, your username would simply be student
If successful, you can proceed with the below steps and the printer queue for TYN-PrintAnywhere should be empty and your print job should show up in the "Jobs Pending Release" area at the https://print.tyndale.ca/ website and be ready for release at a Tyndale printer.
If your password or username was not entered correctly, your print job may be stuck in the print queue. Continue with the below steps to check out the status of your printer queue and associate your correct Tyndale or MyTyndale username and password with the print job.
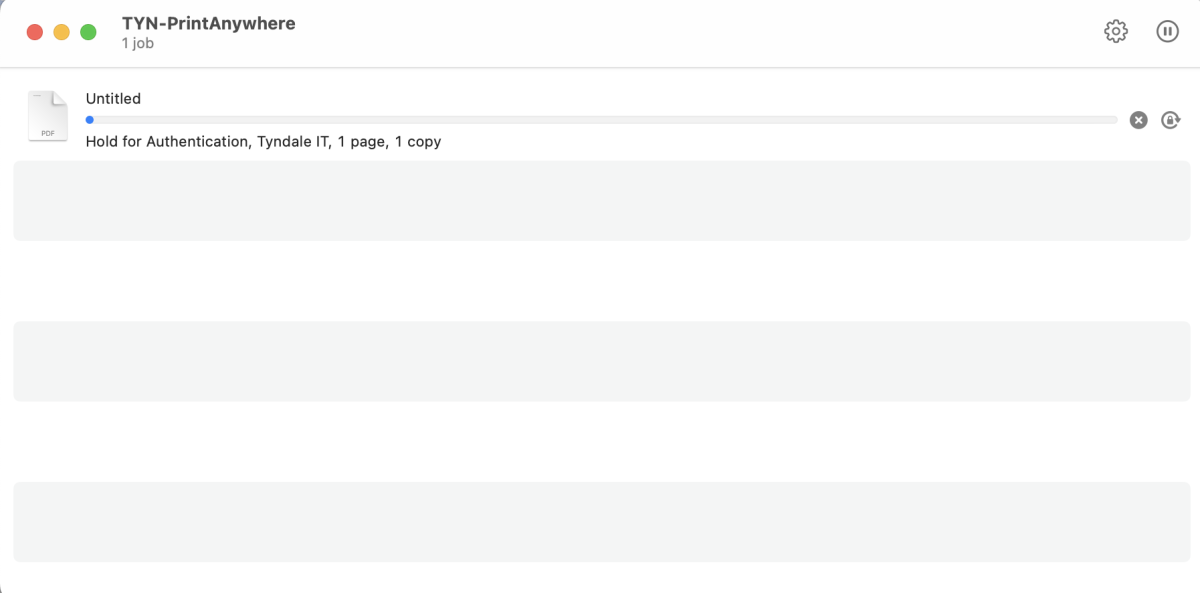
13. Next, we need to associate your Tyndale or MyTyndale username and password with the print queue. Head back to the "Printer and Scanner" settings page that we left open and click on the TYN-PrintAnywhere printer. Then click on the Print Queue button to bring up the printing queue.
14. In the print queue for this printer, you should now see a list of your submitted print jobs (If your print job submission was previously successful in Step 12, the printer queue for TYN-PrintAnywhere should be empty and your print job should show up in the "Jobs Pending Release" area at the https://print.tyndale.ca/ website and be ready for release at a Tyndale printer.)
However, the print job(s) may be "Held for Authentication" and will not print yet. Click on the small lockbox with the circle to the extreme far right of the print job. You should now have an opportunity to type in your Tyndale or MyTyndale username and password. You should only have to do this once.
This information will be used to authenticate your print jobs and deduct any applicable print credit from your print account. As a reminder, your username is the first part of your Tyndale or MyTyndale email address without the @tyndale.ca or @mytyndale.ca portion. If your username is student1 [at] tyndale [dot] ca, your username would simply be student1
Click "Save". When your Tyndale password changes, you will need to come back to this print queue using these instructions and enter your new password.
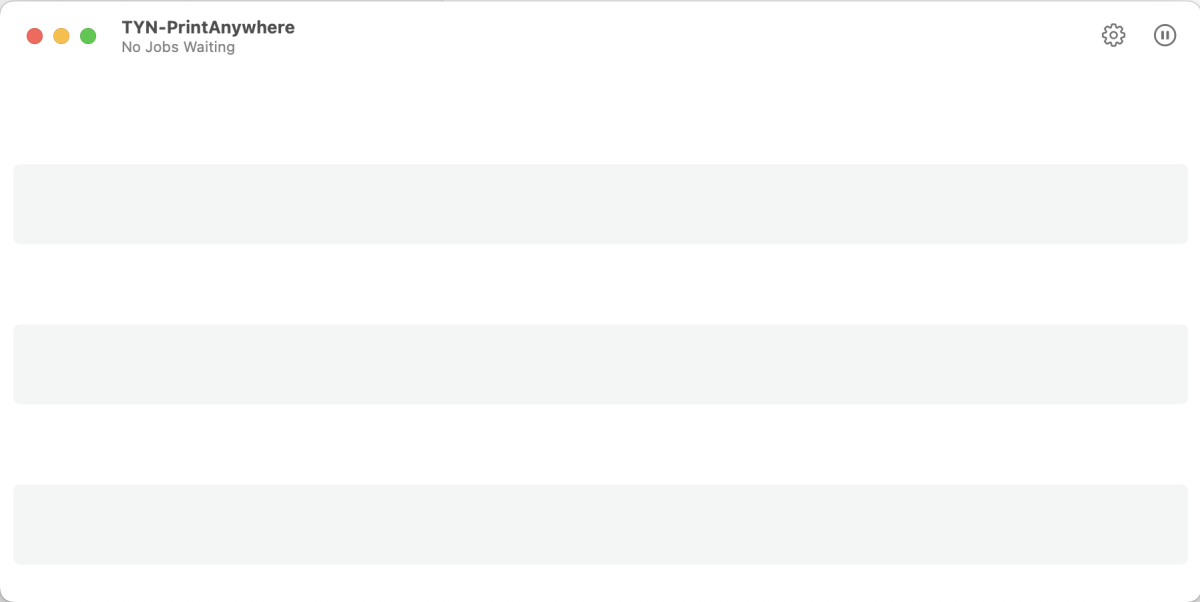
15. Success! The print queue is now empty. Your print job should now be submitted to the server waiting for release. You should also see your print job in the "Jobs Pending Release" area of WebPrint. Your print job is now ready for release from any Tyndale printer.
Congratulations!
Printing Directly from your IOS (iPhone/Ipad) Personal Device
Tyndale printers now support printing directly from your personal device by using what's called PaperCut Mobility Printing. Mobility Printing means that you can now print documents directly to a Tyndale printer from any application or format from your personal device. Currently, supported devices include IOS, Android, Windows and MacOS devices. Unfortunately, at this time, Chromebook devices are not supported. WebPrint remains the best option to print from Chromebook devices.
To setup Mobility Print on your device, please visit https://print.tyndale.ca:9164/setup on your device. The system will autodetect what type of device you are using and display the appropriate set of instructions required to get printing up and running on your device.
Please see below for the list of available instructions for IOS Devices (iPhone/iPad)
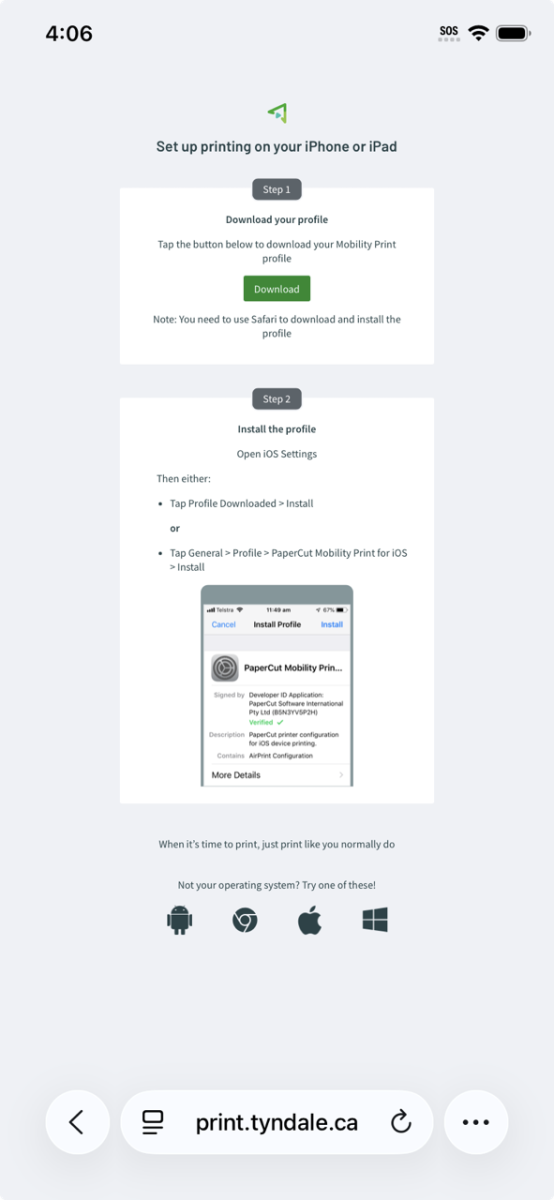
1. Visit https://print.tyndale.ca:9164/setup using the Safari browser on your iPhone/iPad device. Click on the Download button to download the profile file to your device.
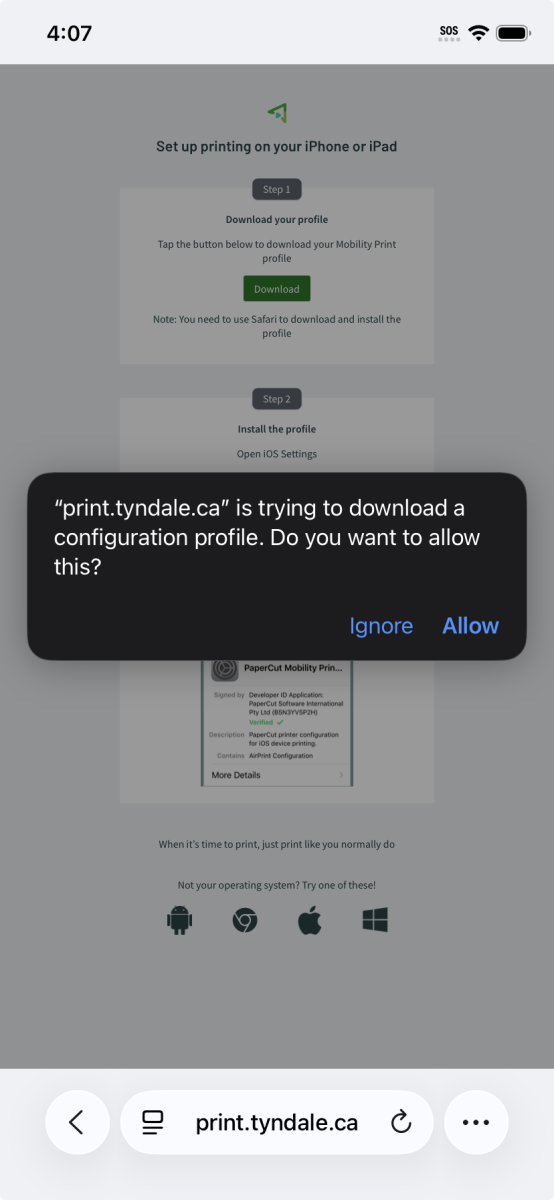
2. Click Allow to permit the downloading of the profile file needed for the printer installation.
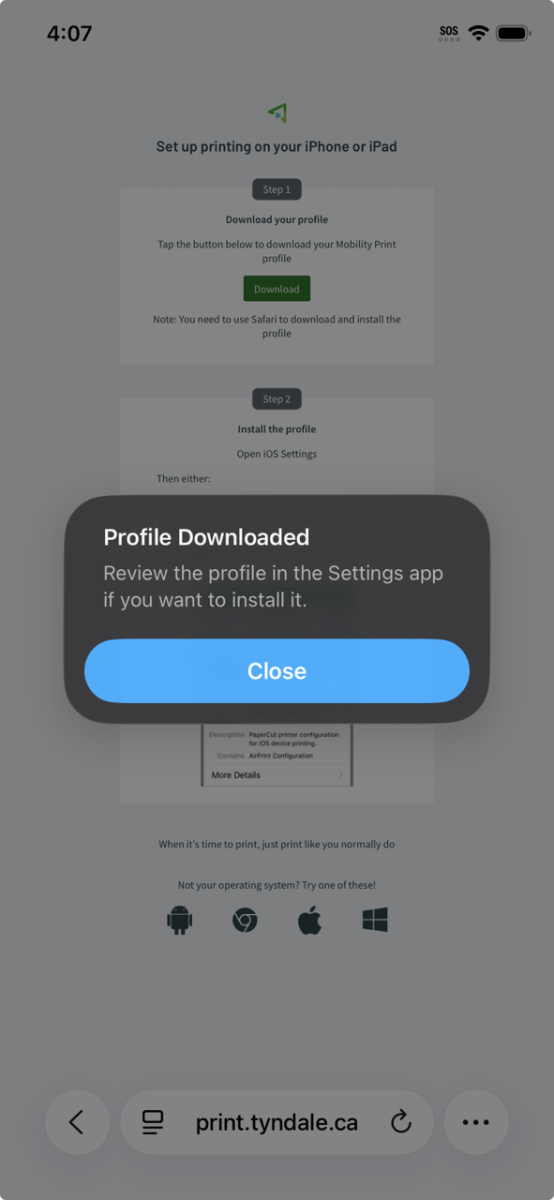
3. The profile should now be downloaded to your device.
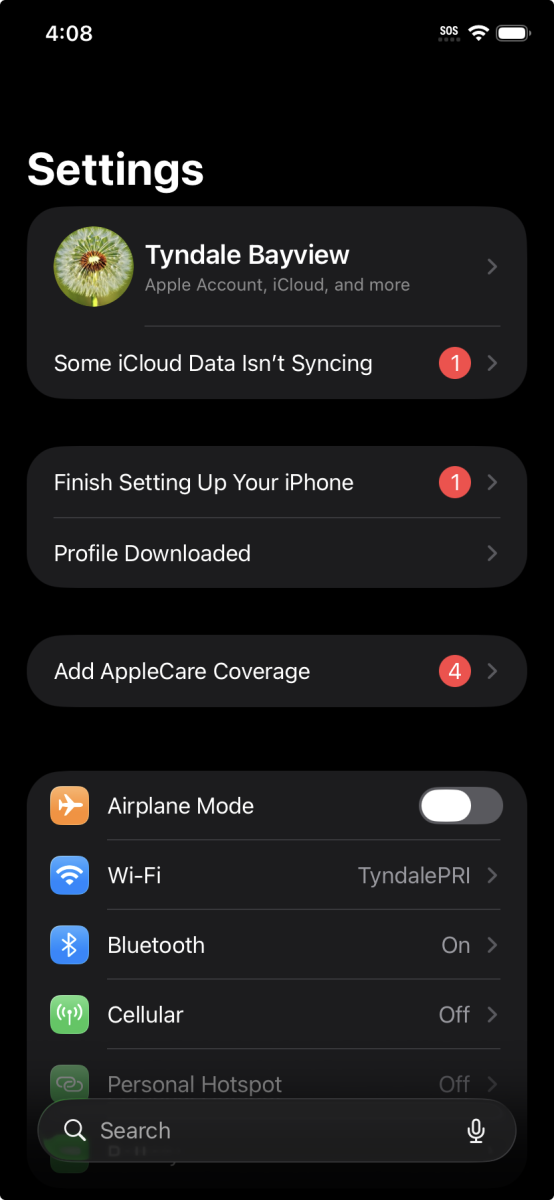
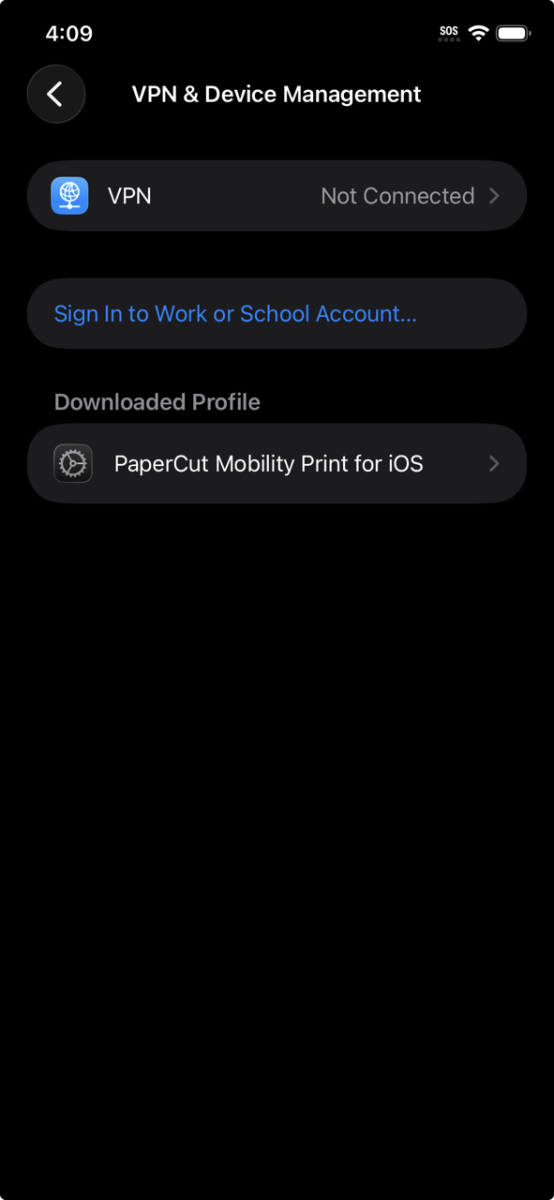
4. Open the Settings app on your device and click on the Profile Downloaded button. Depending on your IOS device in the Settings app, you may have to click General --> Profile to continue with the same instructions.
5. After clicking on the "Profile Downloaded" button, you may be automatically prompted to install the PaperCut Mobility Print profile. You can install it then or click on the downloaded profile "PaperCut Mobility Print for IOS" as noted below to continue the installation.
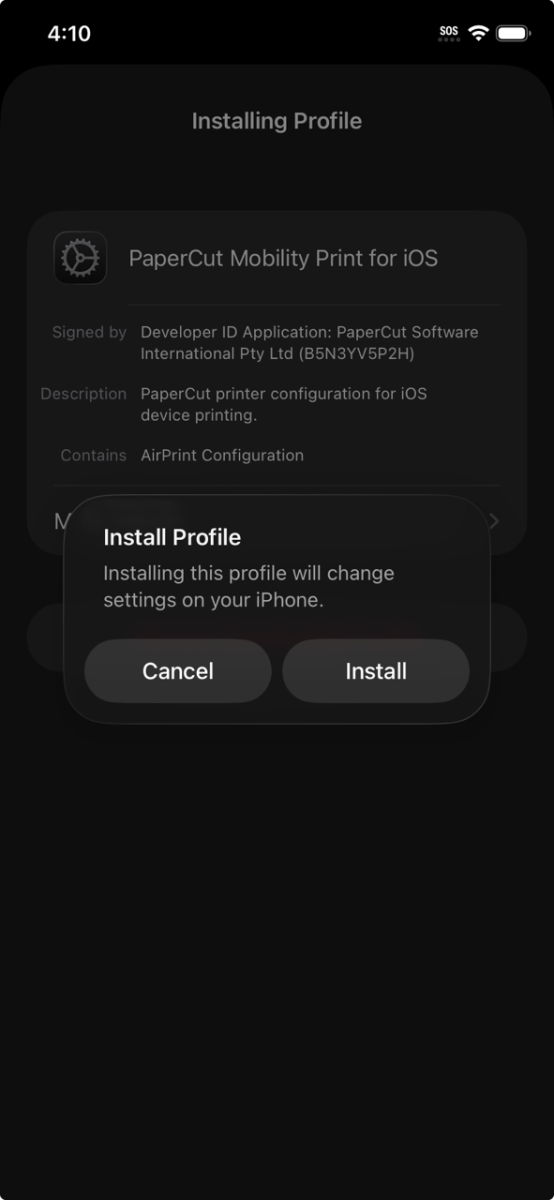
6. Next, click on the Install button on the top right to finalize the installation.

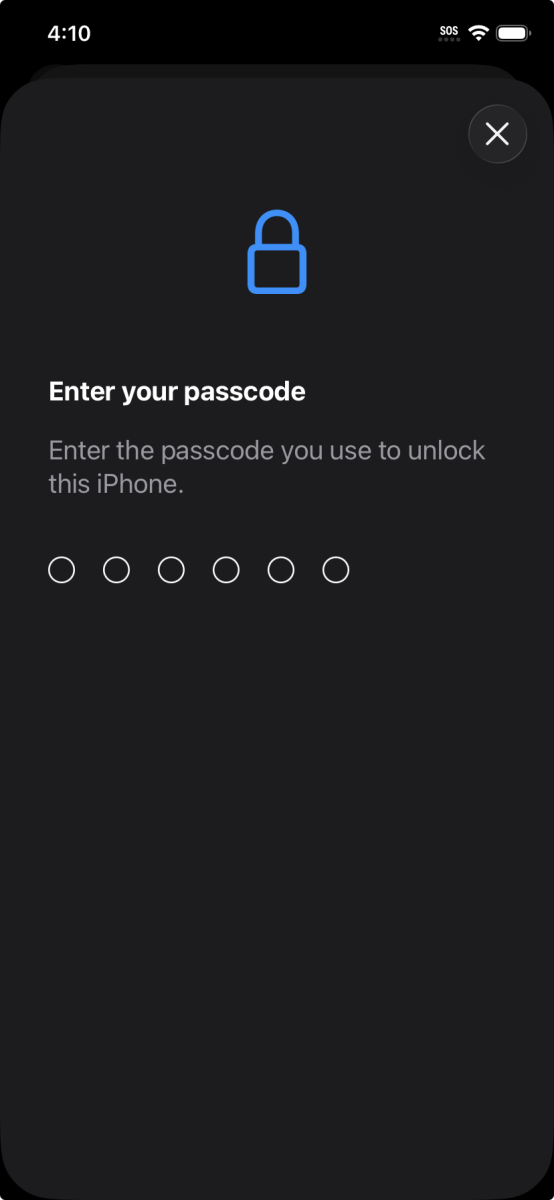
7. Your device may ask for your PIN code or other authorization to confirm the installation.
8. Click Install to again confirm and finalize the installation.
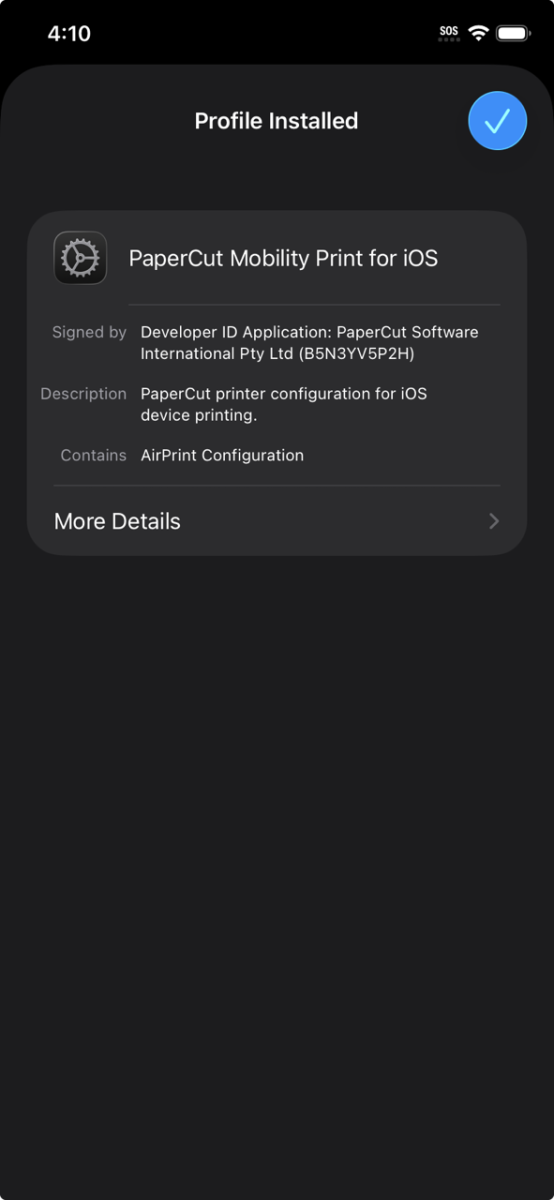
9. Success! The PaperCut Mobility profile is now installed.
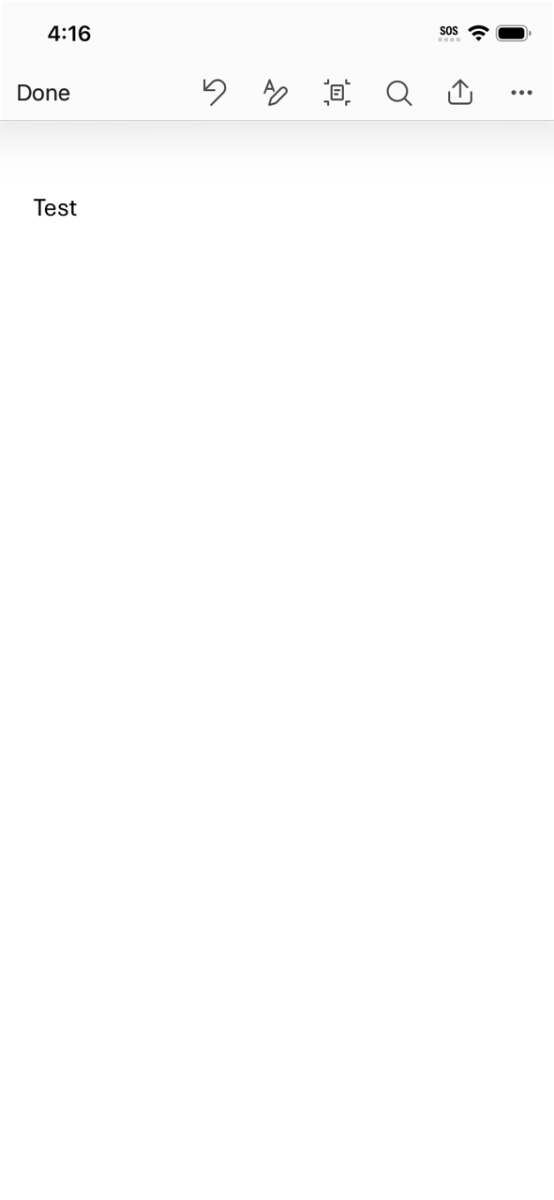
10. Next, we need to submit a print job the Tyndale print queue to associate your Tyndale or MyTyndale username and password with future print jobs. The below screenshot is from the Microsoft Word app in the Apple App store. Other applications are probably similar. In the Word app, click on the Share (up arrow) button on the top right.
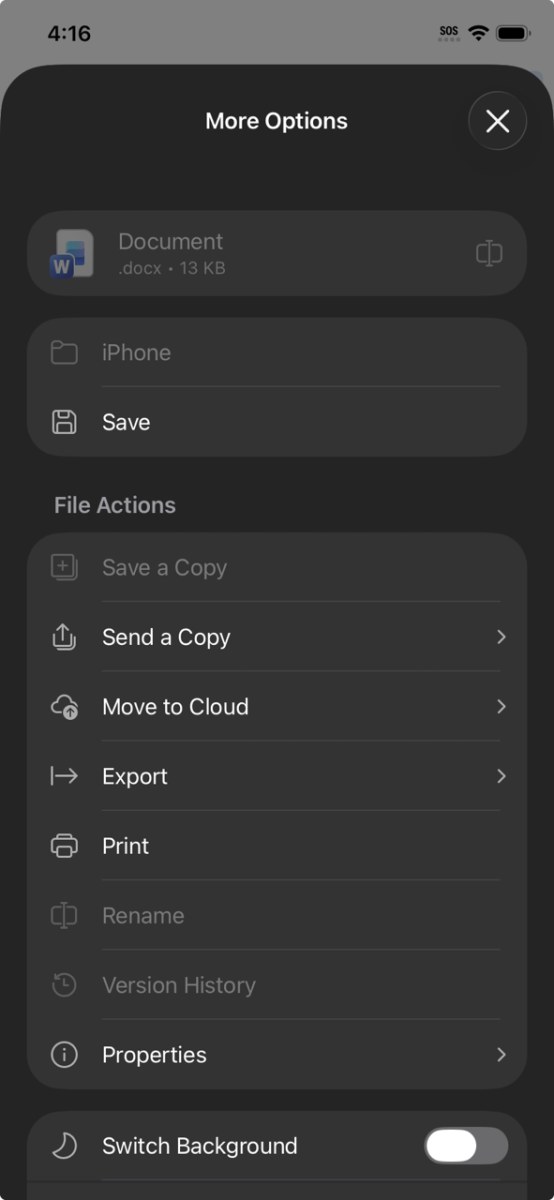
11. With the Share window open, click Print.
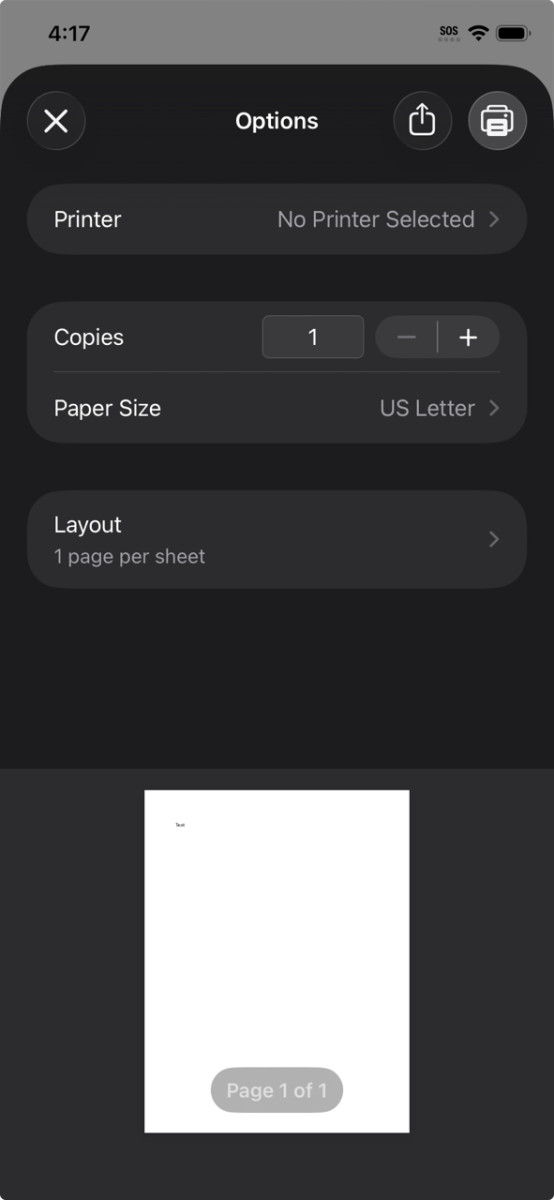
12. In the Print window, click on the existing Printer or "No Printer Selected" option to select the TYN-PrintAnywhere printer.
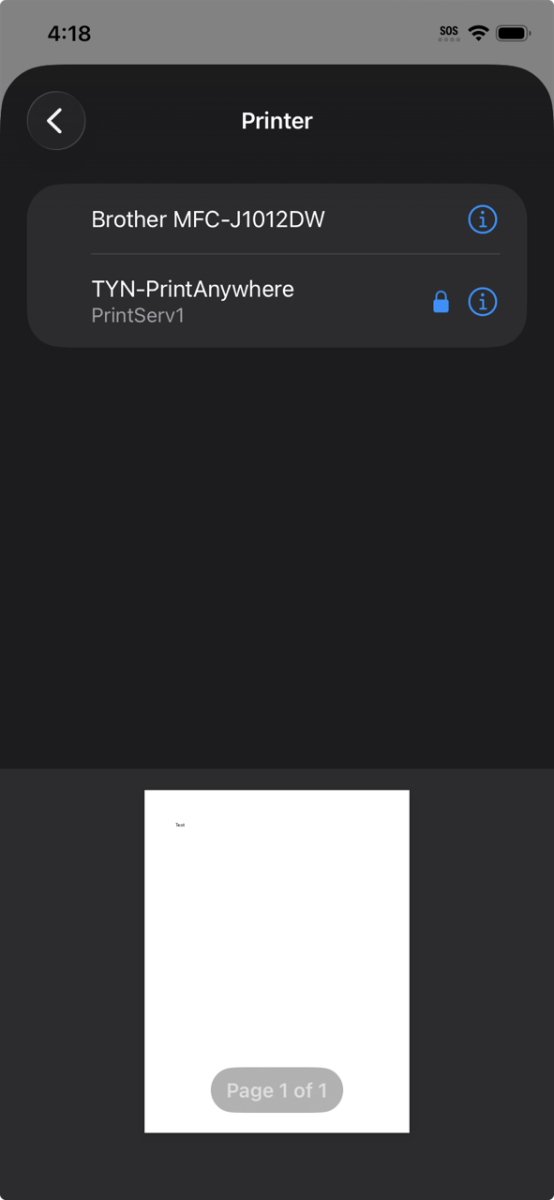
13. Again, select the TYN-PrintAnywhere printer.
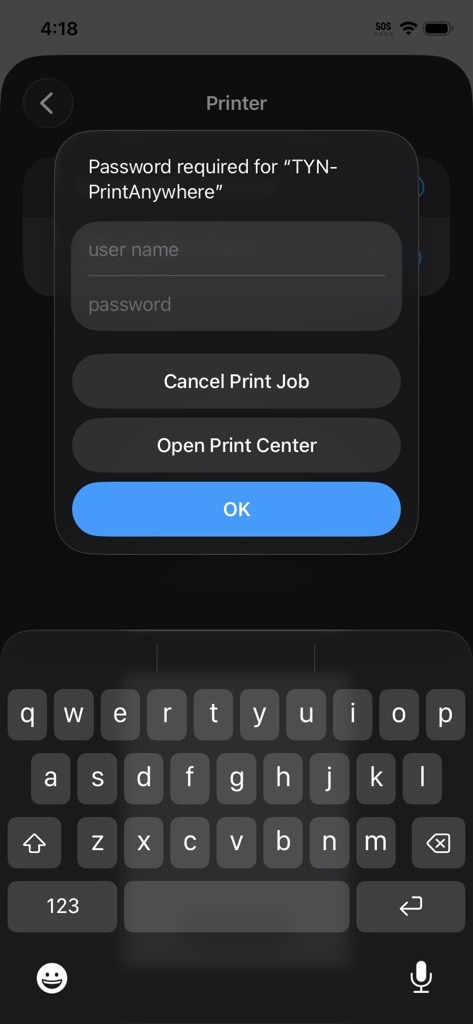
14. You should now be presented with an option to enter your Tyndale or MyTyndale usernamd and password for this print job. You should only have to do this once for this and future print jobs.
This information will be used to authenticate your print jobs and deduct any applicable print credit from your print account. As a reminder, your username is the first part of your Tyndale or MyTyndale email address without the @tyndale.ca or @mytyndale.ca portion. If your username is jamescrow [at] tyndale [dot] ca, your username would simply be jamescrow
Click "OK". When your Tyndale password changes, you will need to come back to this print queue using these instructions and enter your new password.
15. Success! If you are not prompted again for your username and password, your print job should now be submitted to the server waiting for release. You should also see your print job in the "Jobs Pending Release" area of WebPrint. Your print job is now ready for release from any Tyndale printer.
Congratulations!
What Is PrintAnywhere and Student_PrintAnywhere?
PrintAnywhere (and Student_PrintAnywhere - they are the same) is a print queue that allows print jobs to be released and printed at any one of several printers within the campus. PrintAnywhere and Student_PrintAnywhere allows you to send a document for printing and release it from any printer, except for the one Fiery Gardiner Production printer (see below). By default, the PrintAnywhere and Student_PrintAnywhere print queue will be installed on all computers in the Computer Labs, Main Library & the ABBA Resource Centre.
How To Print With PrintAnywhere and Student_PrintAnywhere
- You must be using a Tyndale Computer to use PrintAnywhere or Student_PrintAnywhere (Library, Computer Labs or Classrooms)
- Open your application and/or document
- Initiate a print (typically File > Print or CTRL + P)
- From the list of printers select PrintAnywhere or Student_PrintAnywhere
- Select Printer Properties if you need to select any options such as colour or double sided
- Select the Print button
- Select Accept to proceed with the print job
- The print job is now waiting in the PrintAnywhere or Student_PrintAnywhere queue
What Is Fiery_PrintAnywhere?
Fiery_PrintAnywhere is a print queue that allows print jobs to be released and printed at two specific printers in rooms A301A (near the Seminary Lounge) and F402B (in the UGS Wing). The Fiery_PrintAnywhere print queue is primarily designed for Staff and Faculty use. The main benefit to using the Fiery_PrintAnywhere queue versus the Print_Anywhere queue is that the Fiery_PrintAnywhere queue supports advanced printing features, such as hole-punch and job stapling right as you send the job to the queue. The Fiery_PrintAnywhere queue is not supported on WebPrint.
How To Print With Fiery_PrintAnywhere
- You must be using a Tyndale Computer to use Fiery_PrintAnywhere (Staff, Library, Computer Labs or Classrooms)
- Open your application and/or document
- Initiate a print (typically File > Print or CTRL + P)
- From the list of printers select Fiery_PrintAnywhere
- Select Printer Properties if you need to select any options such as colour, double sided, hole-punch, or stapling.
- Select the Print button
- Select Accept to proceed with the print job
- The print job is now waiting in the Fiery_PrintAnywhere queue
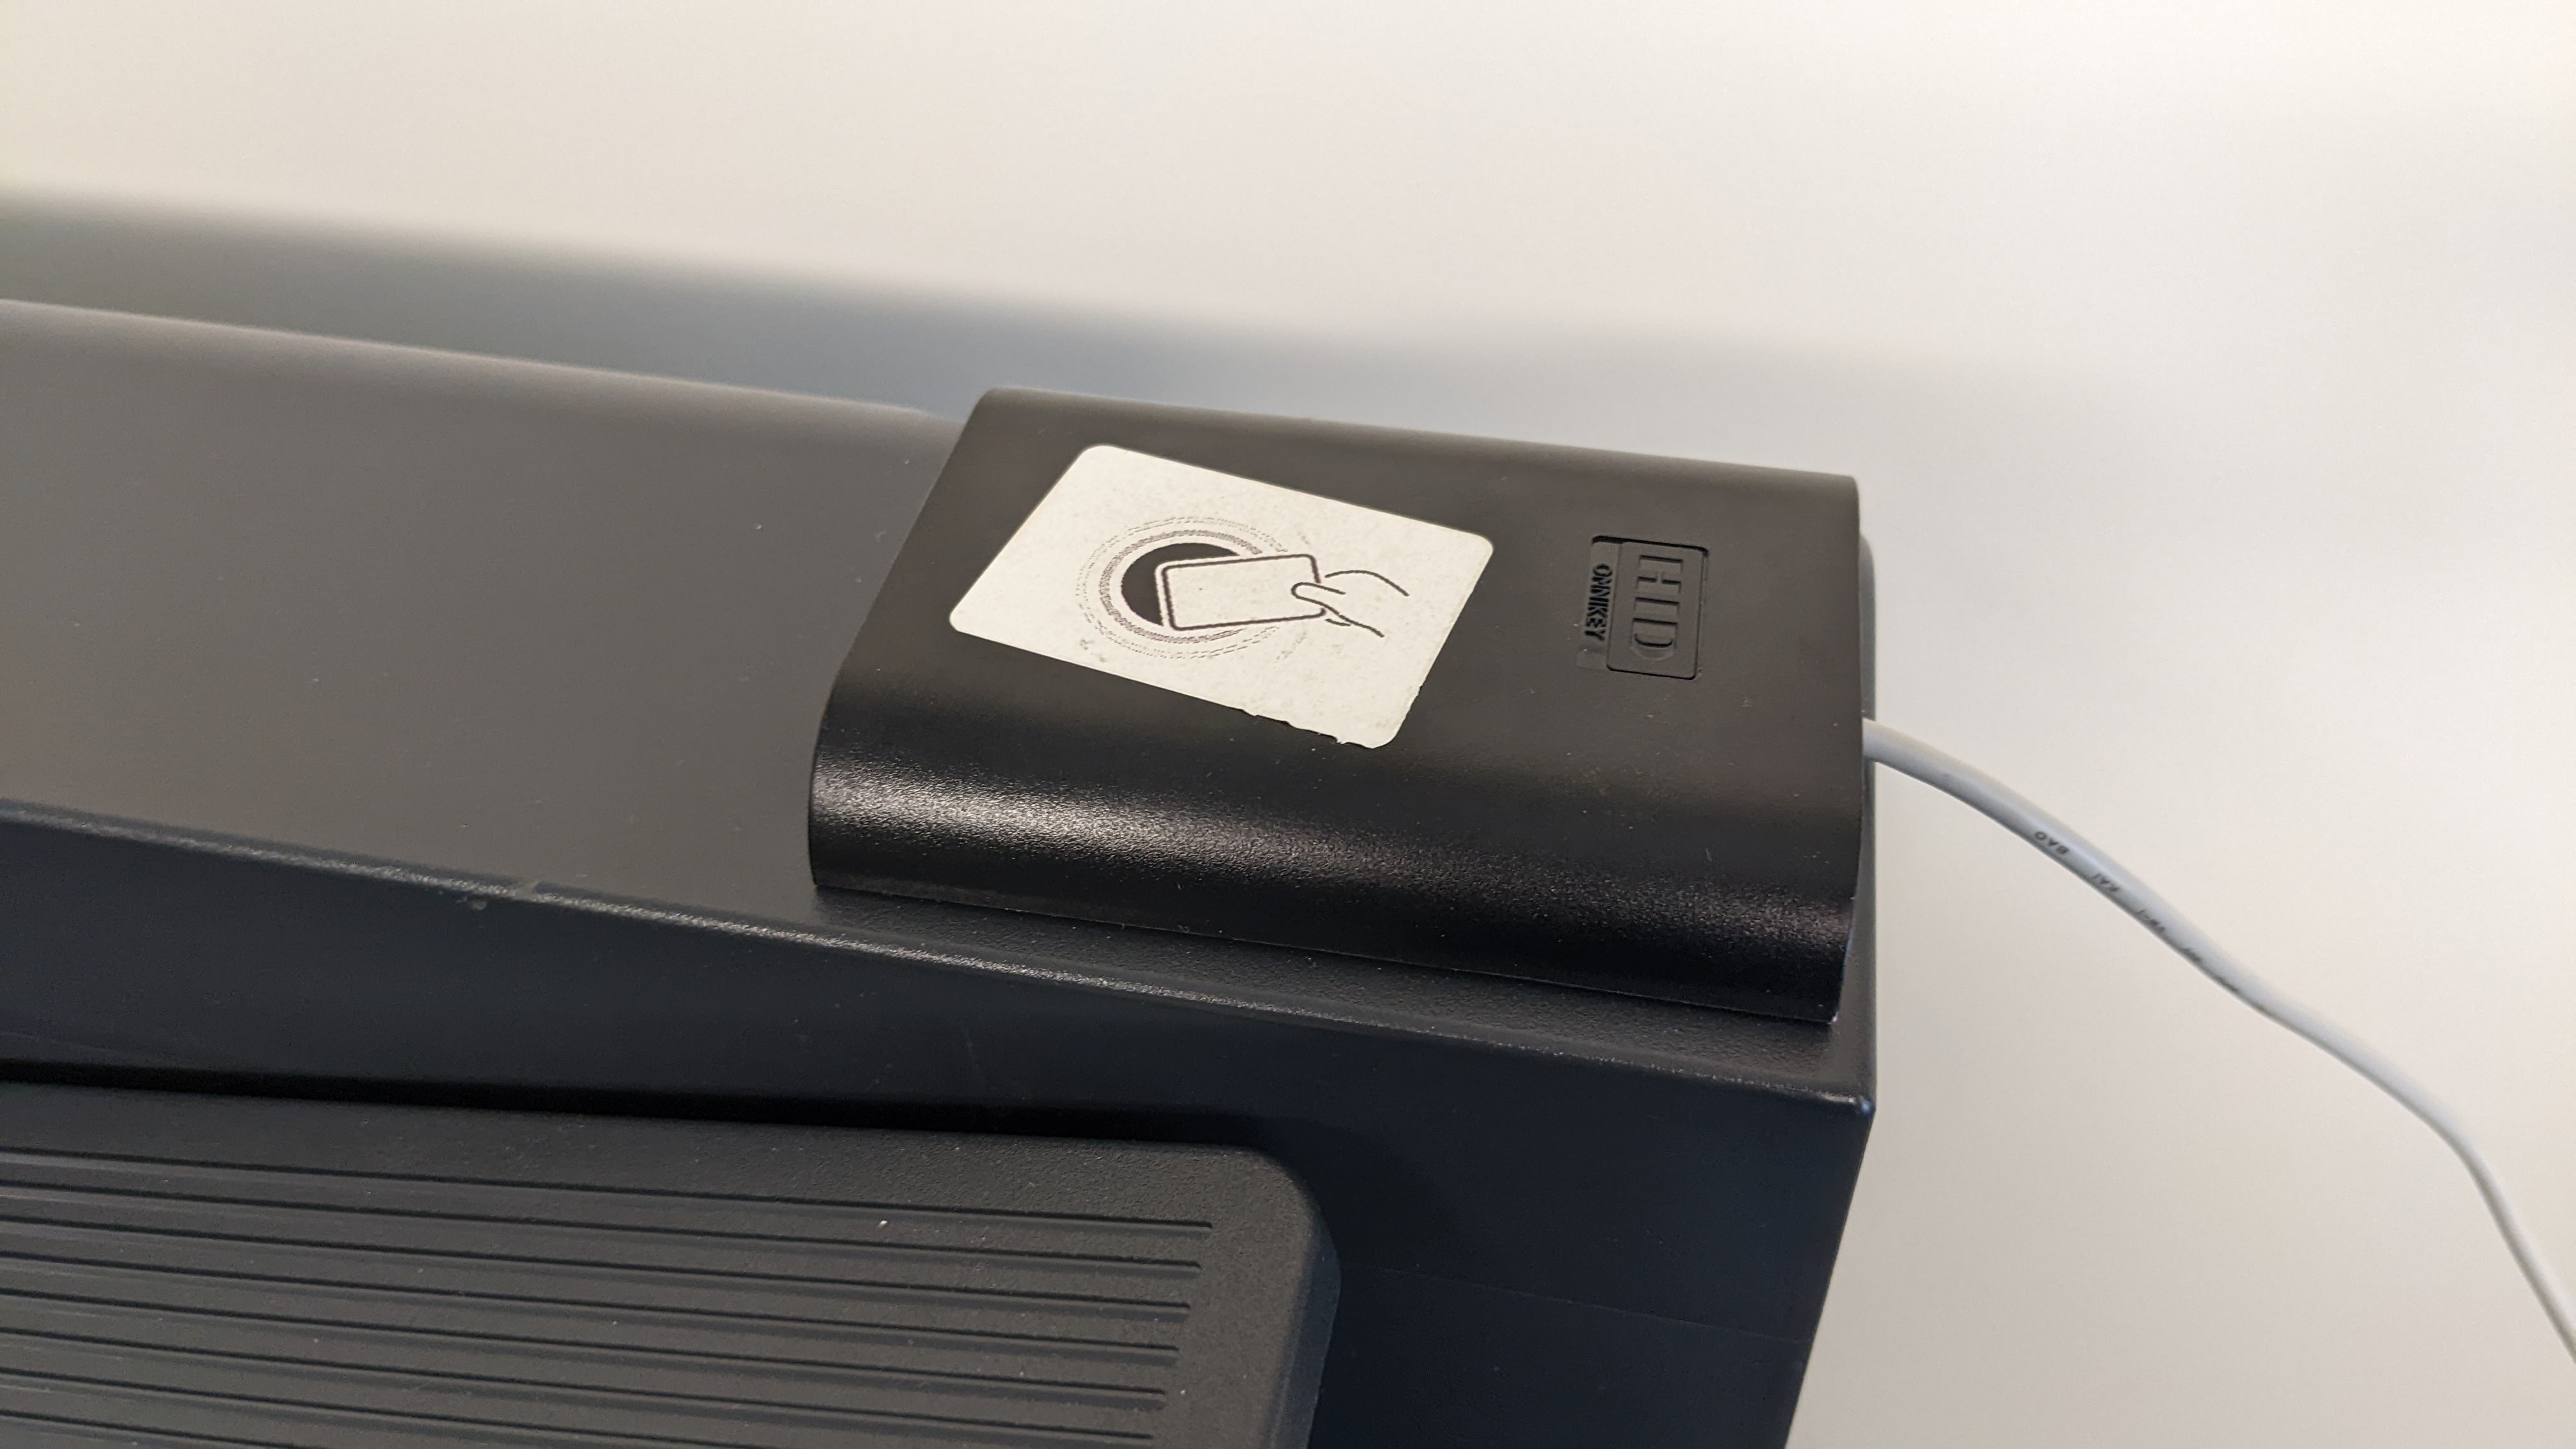
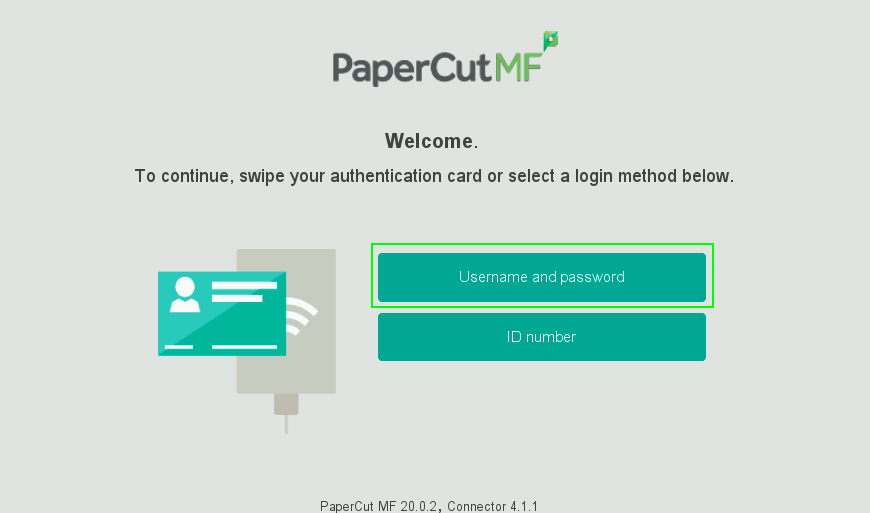
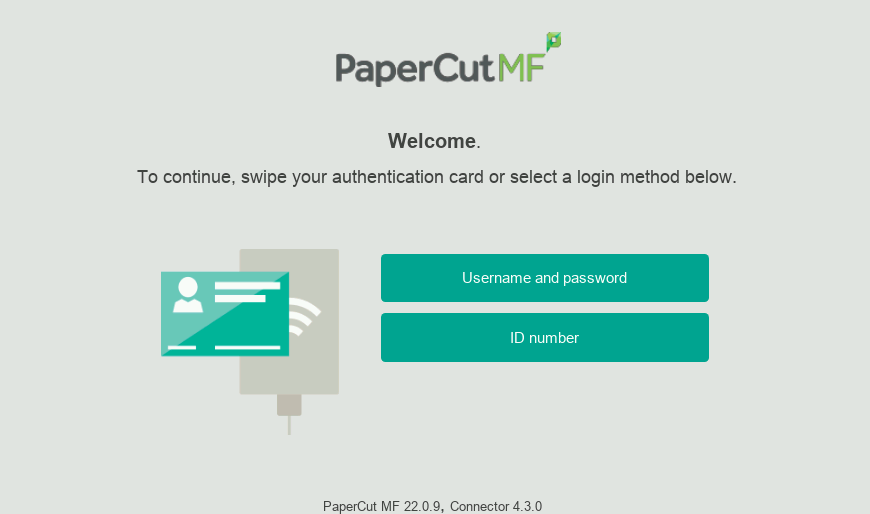
Tyndale printers are available to all staff and students with either a student ID card or staff key FOB. The first time you log into the printer, you will need to tap your card at the tap point and the printer will then have you enter your Tyndale username and password to associate your printing account to your card or FOB. After this point, you can then tap your card and be logged in to the printer without entering your username and password.
If you have forgotten your card at home you also have the option of entering your username and password to login without tapping your card.
If you have or are using a Tyndale-owned device, you can select any of the following printers to print to in the "Print" options of your application:
- PrintAnywhere (Staff and Students)
- Student_PrintAnywhere (Students)
- Fiery_PrintAnywhere (Staff)
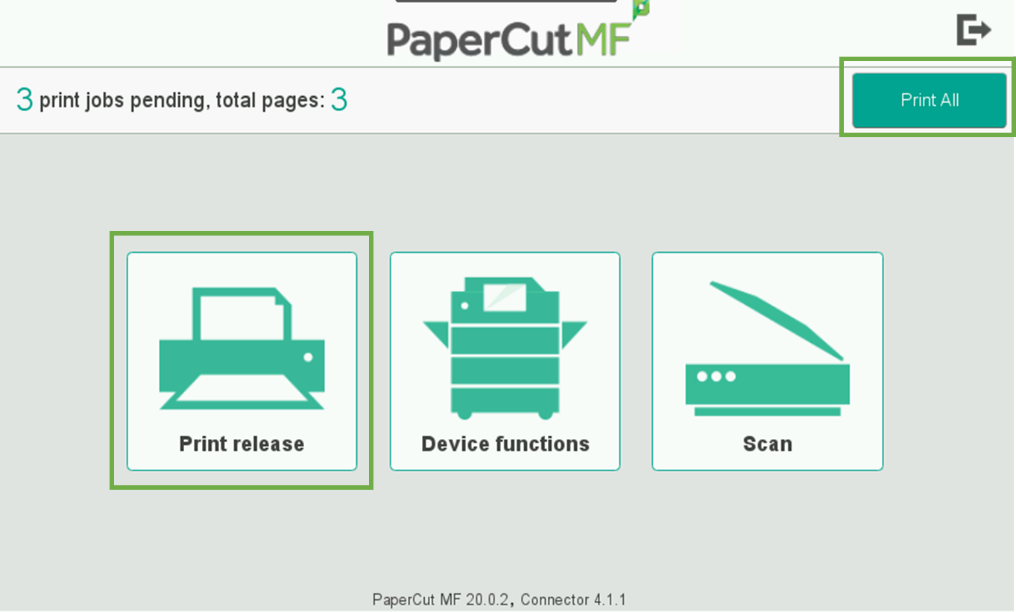
Fiery_PrintAnywhere is for the two large printers, located at A301A and F402B. Student_PrintAnywhere and PrintAnywhere work for all printers, including the ones at A301A and F402B. After sending a print job to a print queue, you can swipe your student ID card or Staff FOB at the printer (or sign in with your username and password) and can release it on the device by either selecting Print All or Print Release and selecting which print jobs you would like to release, which will then be printed.
Adding Print Queues
If the print queue that you want to print to does not exist on your Tyndale-owned computer, you can try adding them manually. Please note that you must be on-campus or on the Tyndale VPN and be working on a Tyndale-owned and issued computer (including remote servers) for these instructions to work.
First, in the search bar at the bottom of your Windows OS, type \\printserv1.tyndale.local and then press enter or click Open :
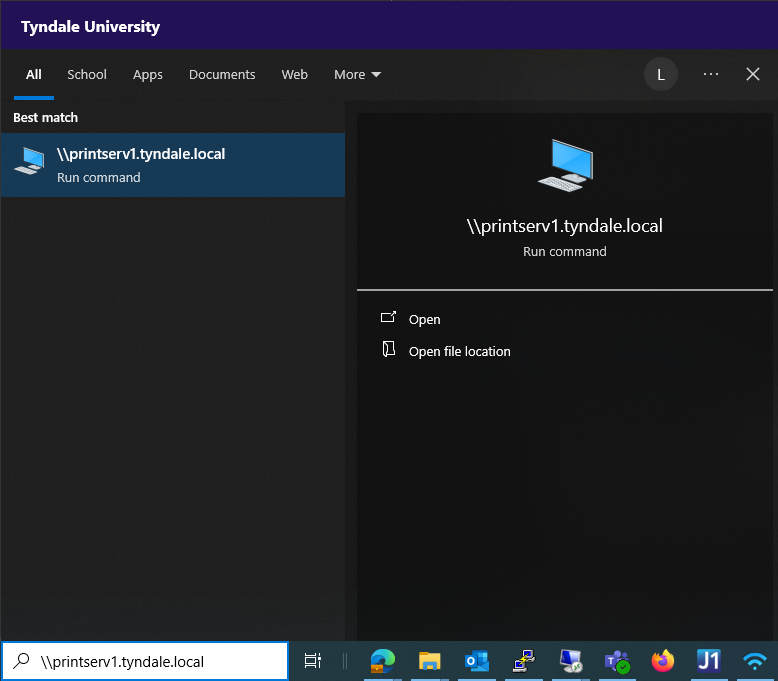
You will then be presented with a list of print queues that you can add to your computer. The primary ones we will be adding are Fiery_PrintAnwyhere, PrintAnywhere and Student_PrintAnywhere. Simply double-click on any of these 3 icons, and that print queue will be installed on your PC and you should be able to print to it.

If you experience issues with this, or are presented with a login and password prompt, please contact Tyndale IT at tyndaleit [at] tyndale [dot] ca or x4361.
UPDATE : for non-Tyndale devices, you now have the option of printing directly from your personal device using PaperCut Mobility print using instructions further down. At this time, Chromebook devices are not supported, so the WebPrint process described below remains the best available option to submit print jobs.
For non-Tyndale devices, please use the WebPrint feature at print.tyndale.ca to print documents. The WebPrint service only accepts documents in PDF format. You will be required to login with your Tyndale username and password and have the appropriate amount of funds loaded before the job can be released from a printer.
Adding Funds/Credit
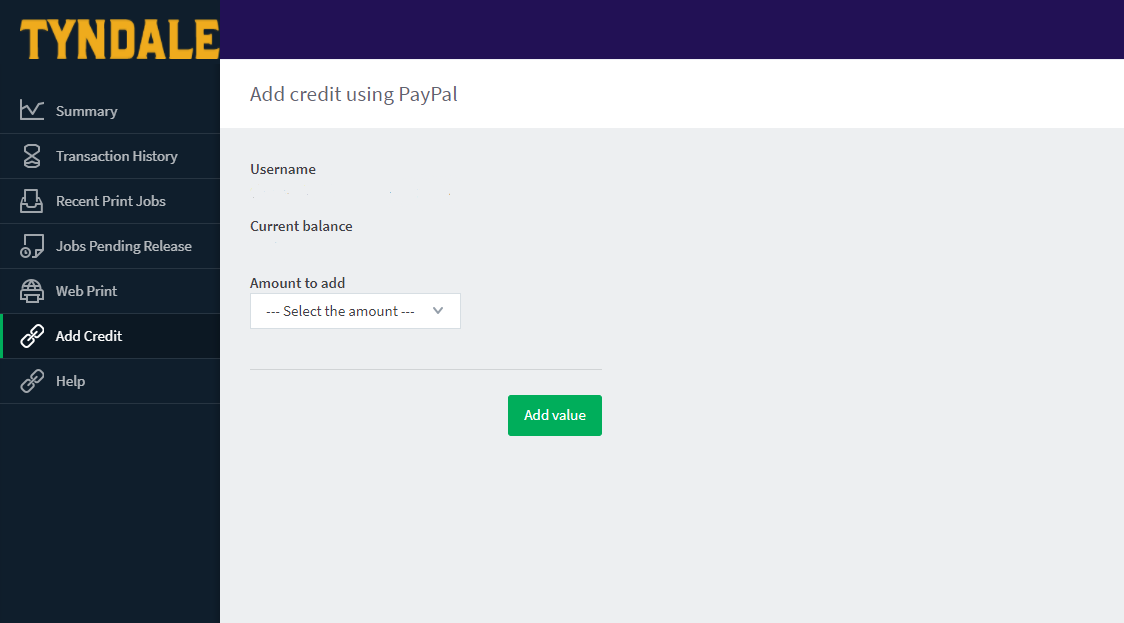
If you are a student, you will need to add funds to your printing account prior to printing. Staff and Faculty do not need to add credit to their account to print. After logging in to print.tyndale.ca, click Add Credit on the left side of the screen. You can add credit by payments through a PayPal account. First, select the amount you wish to deposit from the drop down, and click Add Value to be redirected to PayPal's payment page. You may also pay in person at the Tyndale Library if you would like to add a custom amount of funds to your print account.
Printing With Web Print
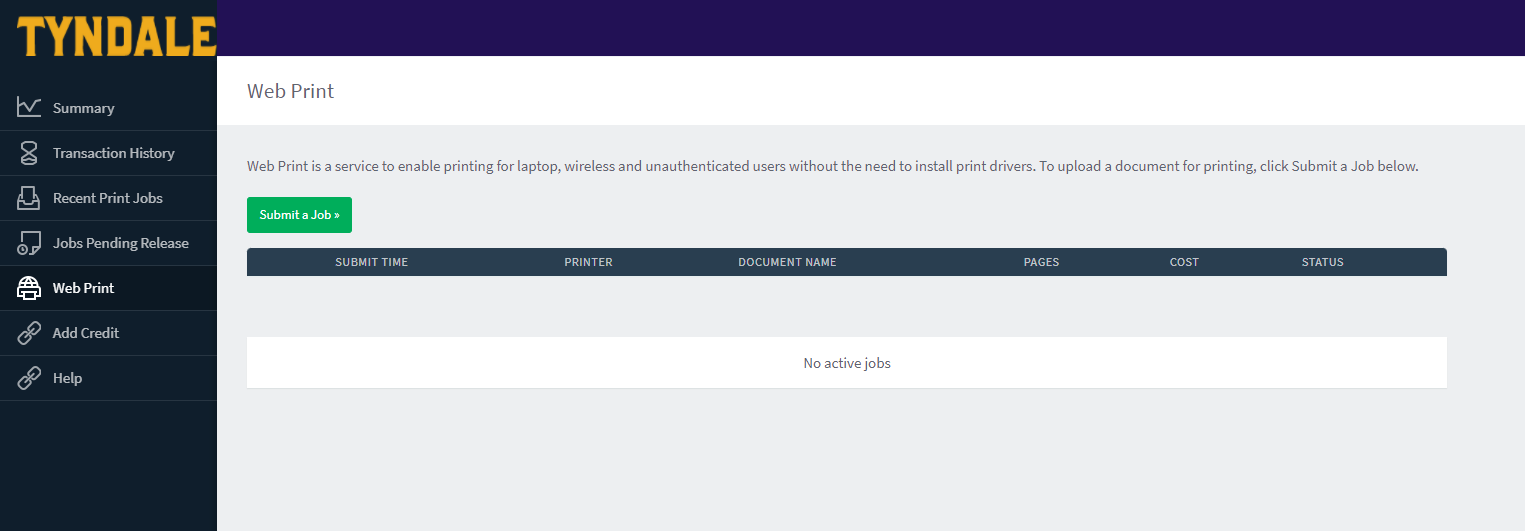
Once you have funds loaded on your account, click Web Print on the left side of the screen. Here you can submit your jobs for print by clicking Submit a Job. All files printed through WebPrint must be PDF format. The print server supports a maximum file size of 50 megabytes (50 MB). A maximum of 40 copies per print job is supported through WebPrint.
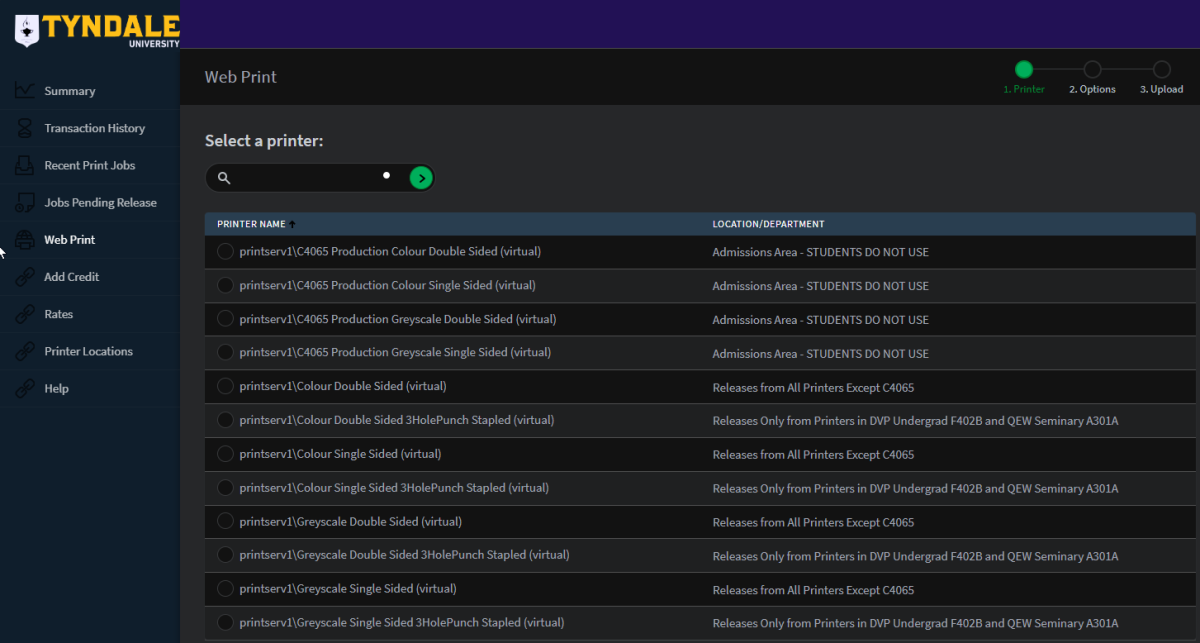
After you click Submit a Job, you will see the below print queue selection on the next screen.
The print queues are named after their function. For example, if you wanted your print job to be single-sided and in greyscale, you should choose the "Greyscale Single Sided" queue. On the other hand, if you want double-sided colour, choose the "Colour Double Sided" print queue.
Or if you want to print Double-Sided Colour with 3-Hole Punch and Stapling functionality, choose the appropriately named queue. (Please note that the 3-Hole Punch and Stapling is only available from the printers located in rooms F402B (Undergraduate) and A301A (Seminary).
Choose what type of print output you want and then click "2. Print Options and Account Selection" at the bottom right.
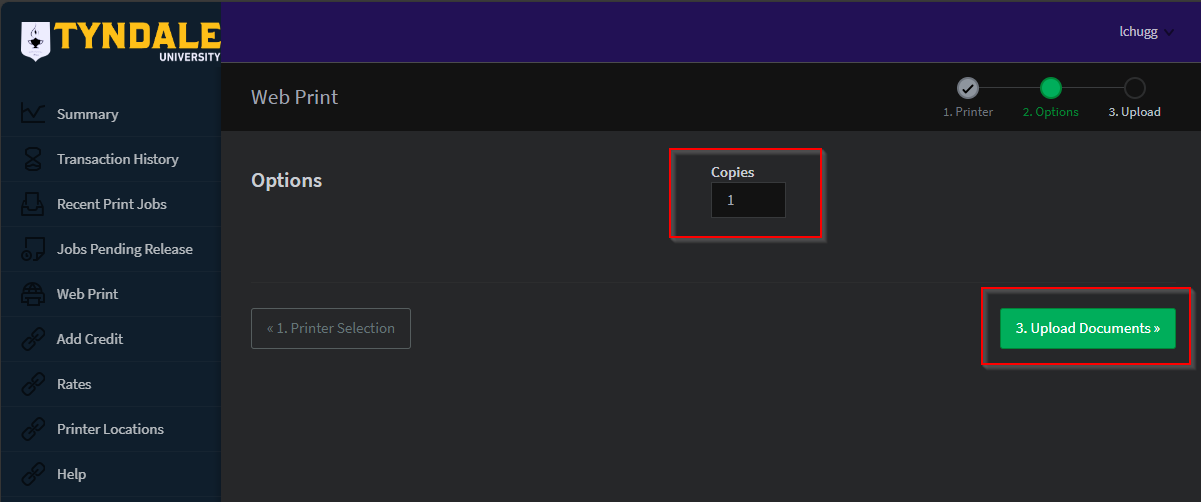
On this next page, choose the number of copies you would like to print, to a maximum of 40. Then, click "Upload Documents."
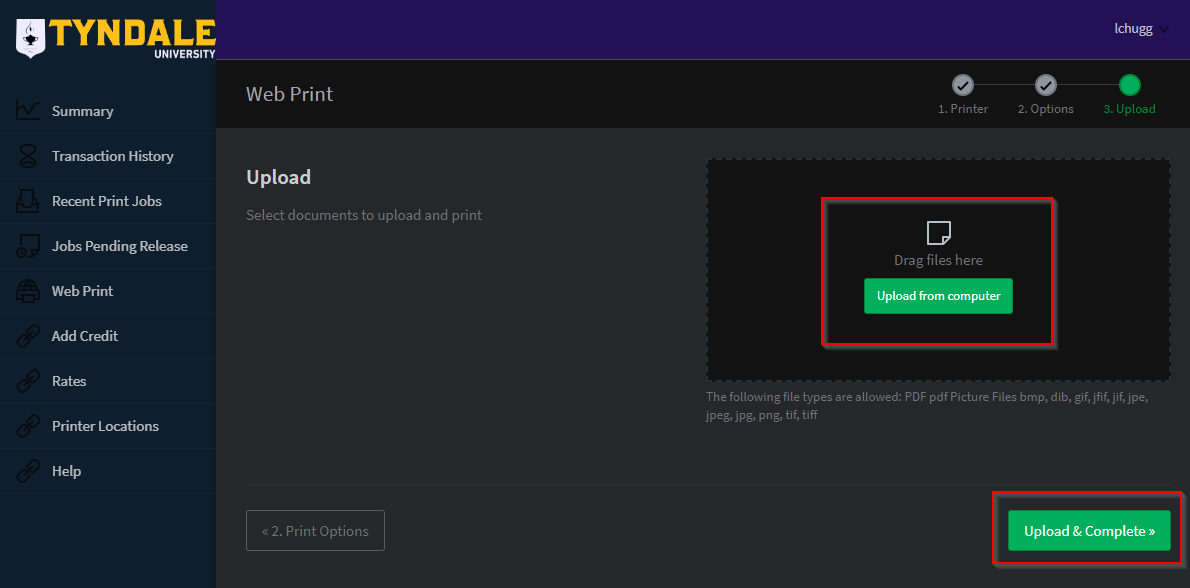
On this next screen, you can choose what PDF files you want to print. Please note that the WebPrint server ONLY supports PDF-formatted files. Please upload only PDF files, and then click "Upload and Complete."
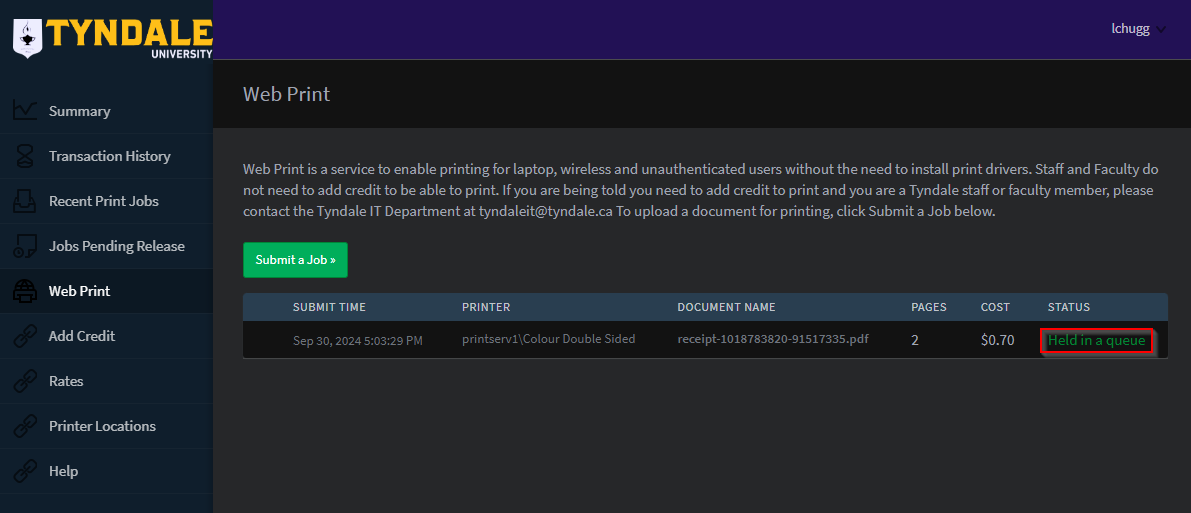
After you've uploaded your PDF files to the server, give the server a few seconds to process the document. For very large documents, this may take a few minutes. Eventually, the Status column will change to "Held in a Queue." This means that the print job is ready to be released from the printer. If you want to cancel the job, you can click on the "Held in a Queue" button and cancel the print job.
When you scan documents on Tyndale printers, the document will be sent to you via email and appear in your student email at webmail.mytyndale.ca. There is no cost to scan documents. Please follow these steps to scan to your email:
1. Sign into the printer (with your student card, staff FOB, or username and password)
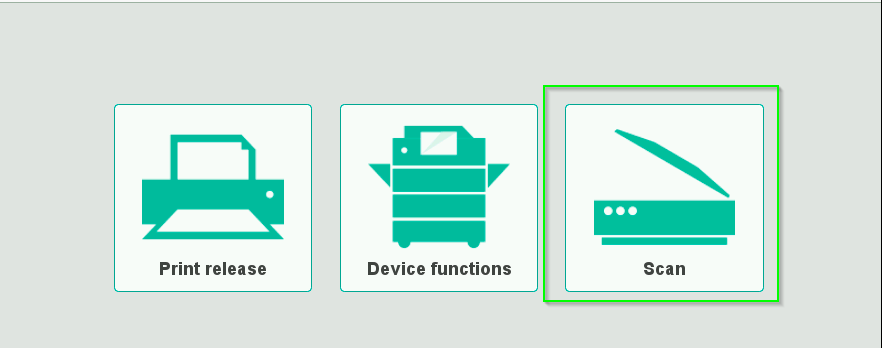
2. Select Scan on the landing page
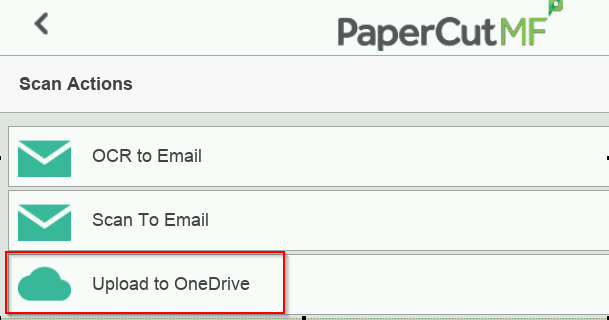
3. Select Scan to Email (for image scanning) or OCR to Email (for a text-readable version of your document) or Upload to OneDrive (see the next section) for scanning your document to your OneDrive account.

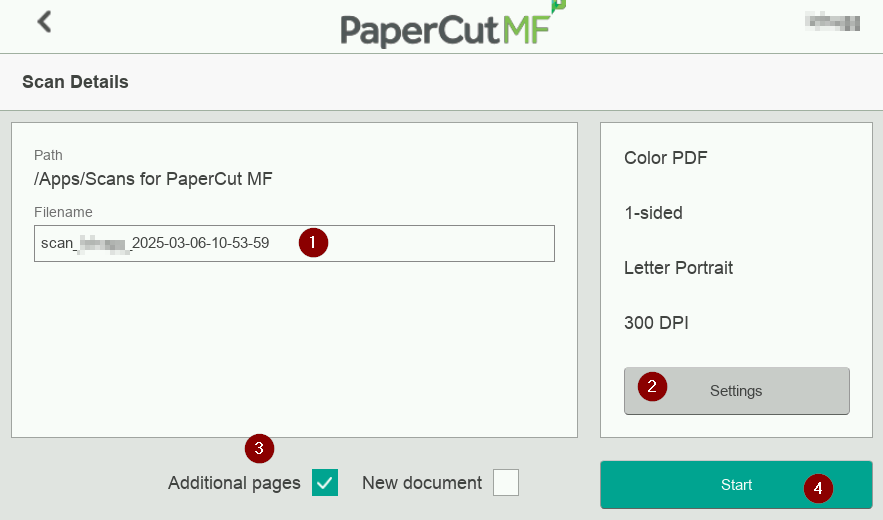
4. Select your scan options, such as file name (1), scan settings (2), check Additional Pages (3) if it's more than one page of scanning, and then press Start (4). If you would the printer to attempt to create text-based PDF version of your document, use the OCR to Email option (please note that the OCR option is dependent on the physical quality of the original source material)

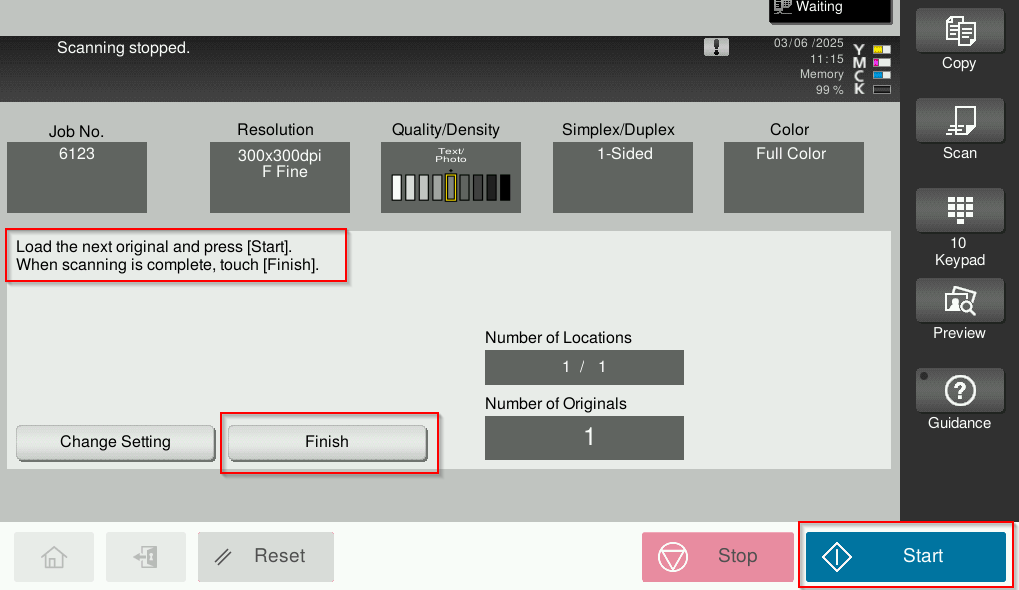
5. After you've clicked Start, you'll be presented with this window to give you the opportunity to add additional pages to your scan job. When you've finished, click Finish and then press Start at the bottom right to send the scanning document.
When you scan documents on Tyndale printers, you will have the option to have the scanned documents sent directly to your Tyndale Microsoft OneDrive cloud storage account.
1. Sign into the printer (with your MyTyndale student card, staff FOB, or username and password)
2. Select Scan on the landing page
3. Select Upload to OneDrive
4. Select your scan options, such as file name (1), scan settings (2), check Additional Pages (3) if it's more than one page of scanning, and then press Start (4).
5. After you've clicked Start, you'll be presented with this window to give you the opportunity to add additional pages to your scan job. When you've finished, click Finish and then press Start at the bottom right to send the scanning document.
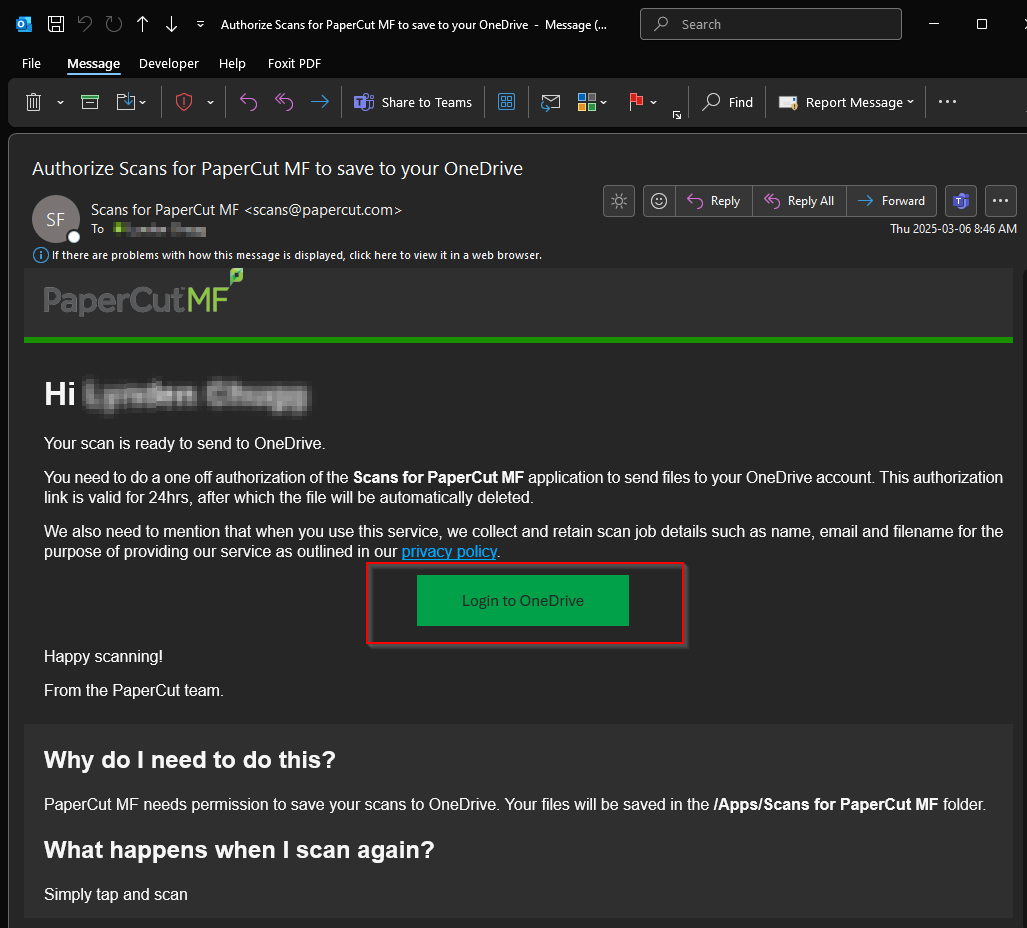
6. Now you must complete a one-time authorization to link your OneDrive account and the PaperCut application. You will receive an email shortly after attempting to send the scan to your OneDrive account that looks like the below. Click on the box entitled "Login to OneDrive" to complete this authorization.
7. Please complete the standard Microsoft 365 sign-in process with your Tyndale account.
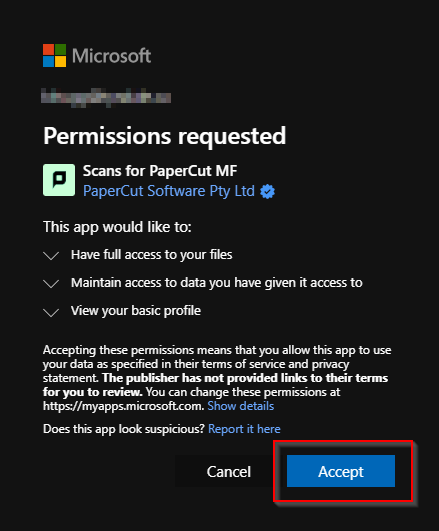
8. After a successful Microsoft 365 sign-in to your OneDrive account, the below permissions window will appear. Click Accept.
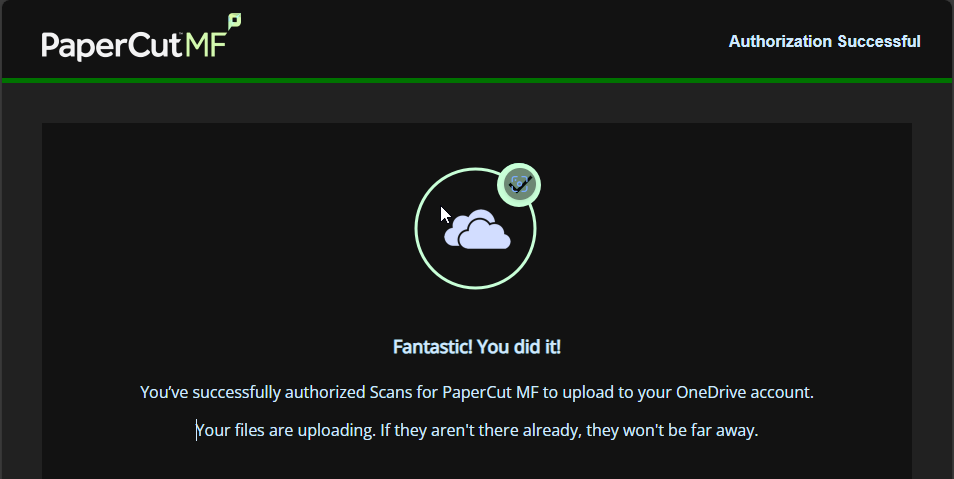
9. Once the authorization is successful, you will receive the below window :
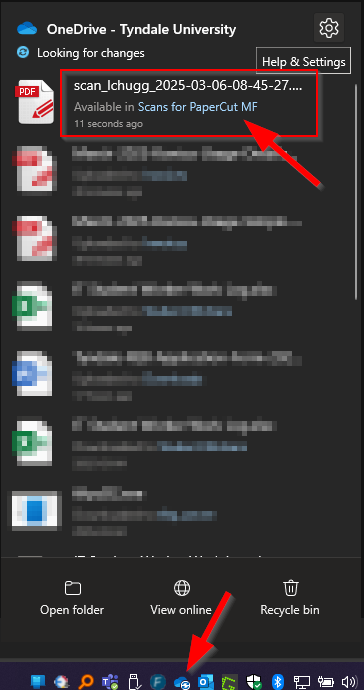
10. Now, the file that you scanned will appear in your Tyndale OneDrive account in the folder titled "Scans for PaperCut MF" in your Documents -> Apps folder.
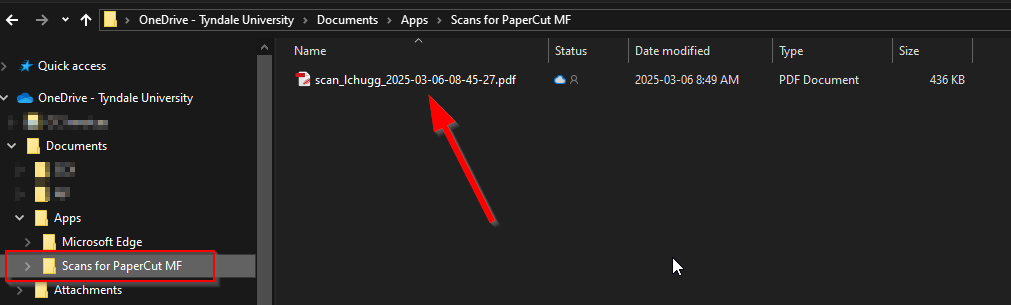
11. You're all done! Future scanning to your OneDrive account will now be automatically sent to this OneDrive folder. No re-authorization is necessary.
Active Printers and where they are located
Fiery_PrintAnywhere, PrintAnywhere, TYN_PrintAnywhere, and Student_PrintAnywhere Print Queues Accessible to Staff and Students
- The QEW Seminary printer located in A301A.
- The DVP Undergrad printer located in F402B.
TYN_PrintAnywhere, PrintAnywhere, and Student_PrintAnywhere Print Queues Accessible to Staff and Students
- The McCowan Library printer located in the Main Library in CH217.
- The Kennedy Library printer located in the Main Library in CH217.
- The Woodbine B.Ed Admin Area printer located outside A321.
- The Don Mills Education Library printer located in the ABBA Centre in A206.
TYN_PrintAnywhere and PrintAnywhere Print Queues Accessible to Staff Only
- The Lawrence Counselling printer located outside The Wellness Centre in A505A.
- The Sheppard Registration printer located in E302.
- The Dundas Business Office printer located in E404.
- The Yonge Reception printer located in CH302.
- The Danforth Presidents Office printer located in CH401.
- The Bloor Campus Services printer located in CH312A.
- The Leslie Library Staff Room printer located in C203.
KM_Gardiner_Production Print Queues Accessible to Staff Only
- The Gardiner Production printer located in the Admissions Department in F315.
Having trouble locating a printer? View the campus map to find one closest to you.